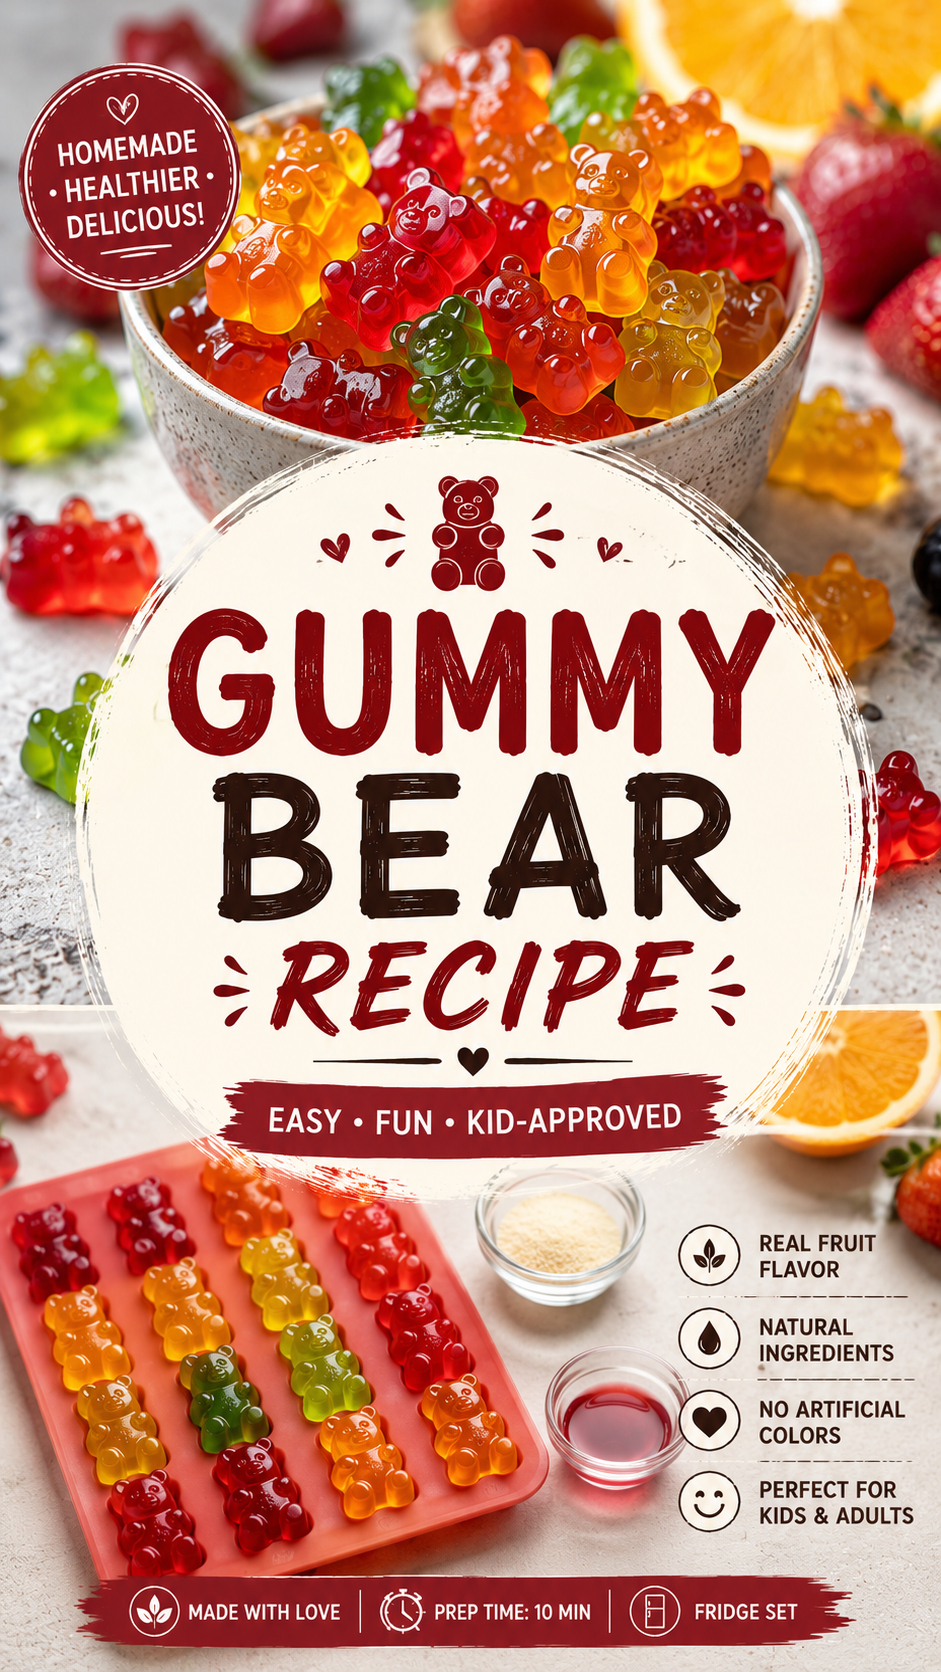
Ever looked at the gummy bear bag and wondered what’s actually in there?
Yeah, me too. And once I found out, I started making my own.
These taste like real fruit, set in the fridge instead of needing any fancy candy-making skills, and take about 10 minutes of actual work. 🐻
Here’s the recipe.
Why Make Your Own
Store-bought gummy bears are mostly sugar, corn syrup, and artificial coloring.
Homemade ones are basically fruit juice and gelatin.
Same chewy texture, completely different ingredient list. And honestly? They taste better too.
What You’ll Need
- 1 cup 100% fruit juice (any flavor)
- 3 tbsp unflavored gelatin powder
- 1-2 tbsp honey (optional, for sweetness)
- A few drops of natural food coloring (optional)
Four ingredients, and two of them are totally optional.
Tools You’ll Need
- A small saucepan
- A whisk
- A measuring cup
- Gummy bear silicone molds
- A dropper or small spoon (for filling molds)
How to Make Gummy Bears
Step 1: Combine Juice and Gelatin
Pour the fruit juice into a small saucepan.
Sprinkle the gelatin powder over the top and let it sit for 2-3 minutes. This helps it dissolve without clumping.
Step 2: Heat Gently
Place the saucepan over low heat and whisk continuously.
Heat just until the gelatin fully dissolves, this only takes 2-3 minutes. Don’t let it boil. 🔥
Step 3: Sweeten (Optional)
If you’re using honey, stir it in now while the mixture is still warm.
Taste and adjust. Remember it’ll taste less sweet once it’s cold and set.
Step 4: Fill the Molds
Using a dropper or small spoon, fill each gummy bear mold to the top.
Work quickly, the mixture starts setting as it cools.
Step 5: Chill
Place the molds in the fridge for 20-30 minutes, or until fully set.
Step 6: Pop and Serve
Gently pop the gummy bears out of the molds.
Store in an airtight container in the fridge.
Pro Tips
1. Don’t skip the “bloom” step. Letting the gelatin sit in the juice before heating prevents lumpy, grainy gummies.
2. Heat is everything here. Too hot and the gummies turn rubbery instead of chewy. Low and slow is the way to go.
3. Fill molds fast. The mixture sets faster than you’d expect, especially in smaller molds. Have everything ready before you start pouring.
4. Use a dropper for cleaner results. Pouring straight from the saucepan tends to be messy and uneven. A dropper gives you way more control.
5. Tart juices need more sweetener. Cranberry or grapefruit juice will taste noticeably more sour once cold, so taste-test and adjust before chilling.
Substitutions and Variations
| Original | Swap | Notes |
|---|---|---|
| Fruit juice | Sparkling water + flavor extract | Lighter, less sweet result |
| Honey | Maple syrup or agave | Great for a vegan-friendly sweetener |
| Unflavored gelatin | Agar agar | Makes these vegan, but texture is firmer |
| Bear molds | Any silicone candy mold | Shapes don’t affect the recipe |
| Single flavor | Layer two juices | Pour one layer, chill slightly, add the second |
Want a vitamin boost? Mix in a scoop of vitamin C powder for homemade “gummy vitamins.”
Going vegan? Swap gelatin for agar agar, just know the texture will be firmer and less “chewy.”
Make Ahead Tips
These are basically made to be made ahead.
- Store in the fridge for up to 2 weeks in an airtight container.
- Make a double batch and freeze extras in a sealed bag for up to 2 months.
- Let frozen gummies thaw in the fridge for a few hours before eating.
Leftovers and Storage
Keep gummy bears in an airtight container in the fridge for up to 2 weeks.
They can sit out at room temperature for a few hours without melting, but they’ll stay firmer in the fridge.
If they start sticking together, toss them with a tiny bit of cornstarch. 🙃
FAQ
Why are my gummies too soft?
Not enough gelatin, or they didn’t chill long enough. Try adding an extra tablespoon of gelatin next time.
Why are my gummies rubbery instead of chewy?
The mixture was likely heated too long or at too high a temperature. Keep it on low heat.
Can I use flavored gelatin instead of unflavored?
You can, but it’ll add extra sugar and artificial flavoring, which kind of defeats the purpose of making these from scratch.
Do I need special molds?
Silicone bear molds work best because the gummies pop out easily. Hard plastic molds can be tricky to release from.
Can kids help make these?
Definitely. Filling the molds is a fun, low-mess task for little hands once the mixture has cooled slightly.
Wrapping Up
Homemade gummy bears are one of those things that feel like a kitchen trick once you’ve made them.
Four ingredients, a quick chill in the fridge, and suddenly you’ve got a snack that’s actually good for you.
Give it a try and let me know how yours turned out. What juice flavor did you use? Did you add the honey? I’d love to hear about it in the comments. 💬
And if your gummies came out too soft or too firm, drop a comment, happy to help troubleshoot!