I’ve made a lot of apple cakes that turned out dry, dense, or just kind of forgettable.
This one isn’t any of those things. 🍎
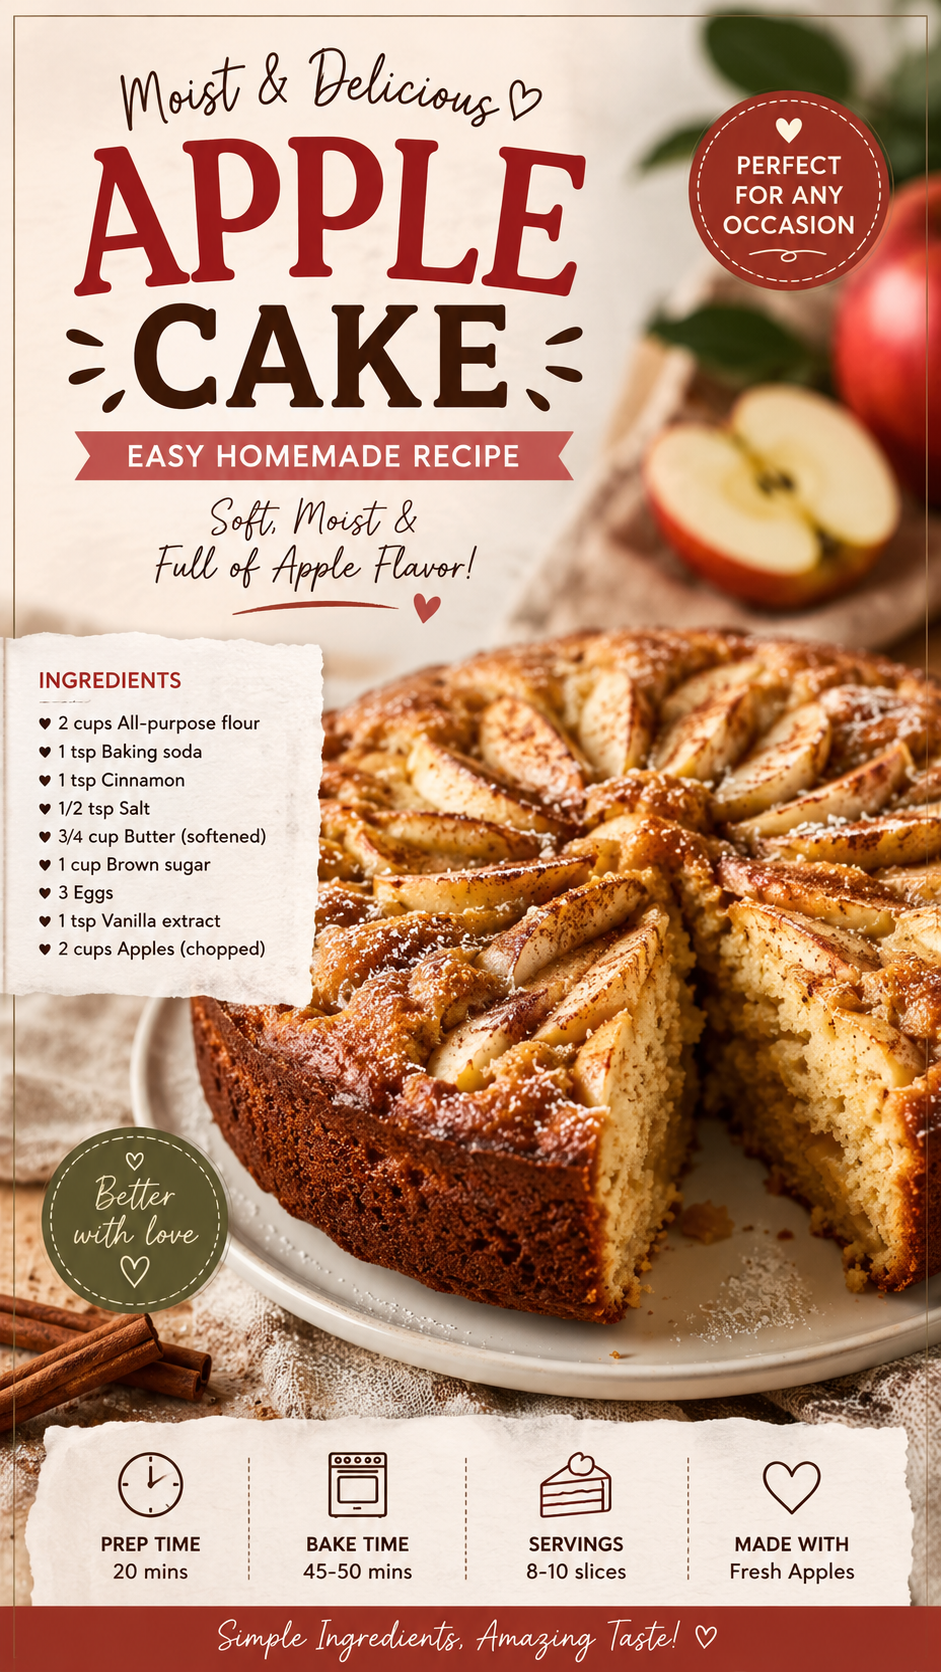
This apple cake is soft, moist, and packed with chunks of cinnamon-spiced apple in every single bite.
No glaze required, no fussy decorating. Just a simple, homestyle cake that tastes like fall whenever you make it.
And it comes together with ingredients you probably already have sitting in your kitchen right now.
Here’s something I learned along the way: using oil instead of butter in cake batters generally produces a more moist, longer-lasting crumb, since oil stays liquid at room temperature while butter solidifies. 🧈
That small swap is a big part of why this cake stays soft for days instead of drying out by the second.
Why This Recipe Works
A lot of apple cakes go dry because they don’t use enough fat or moisture to balance out the apples.
This recipe leans on both oil and brown sugar, which keep the cake noticeably more moist than recipes relying on butter and white sugar alone.
The diced apples also release a little moisture as they bake, which keeps the inside of the cake soft and tender instead of crumbly.
And the cinnamon and warm spices tie everything together, making it taste like more effort went into it than actually did.
What You’ll Need
- 2 cups all-purpose flour
- 1 tsp baking soda
- 1 tsp ground cinnamon
- ½ tsp ground nutmeg
- ½ tsp salt
- 3 large eggs
- 1 cup vegetable oil
- 1 cup brown sugar
- ½ cup granulated sugar
- 1 tsp vanilla extract
- 3 cups diced apples (about 3 medium apples)
That’s the full list, and chances are you already have most of it in your pantry.
Tools You’ll Need
- 9×13 baking pan or bundt pan
- Large mixing bowl
- Whisk
- Rubber spatula
- Cutting board and knife for the apples
How to Make Moist Apple Cake
Step 1: Prep your pan and oven
Preheat your oven to 350°F and grease your baking pan well.
If using a bundt pan, make sure to grease every groove thoroughly so the cake releases cleanly later.
Step 2: Mix the dry ingredients
In a bowl, whisk together the flour, baking soda, cinnamon, nutmeg, and salt.
Set this aside while you prepare the wet ingredients.
Step 3: Mix the wet ingredients
In a separate large bowl, whisk together the eggs, vegetable oil, brown sugar, granulated sugar, and vanilla extract until smooth.
Step 4: Combine
Gradually add the dry ingredients into the wet ingredients, stirring just until combined.
Avoid overmixing here. Stop as soon as the flour disappears into the batter, since overworking the batter at this stage can make the final cake tougher than it should be.
Step 5: Fold in the apples
Gently fold the diced apples into the batter using a rubber spatula.
The batter will be thick at this point, almost more like a dense cookie dough than a typical cake batter. That’s completely normal.
Make sure the apples are distributed evenly throughout, rather than clumped in one section of the bowl.
Step 6: Bake
Pour the batter into your prepared pan and spread it evenly.
Bake for 45-55 minutes, or until a toothpick inserted into the center comes out clean.
If the top starts browning too quickly before the inside finishes baking, loosely tent it with foil for the remaining bake time.
Step 7: Cool and serve
Let the cake cool in the pan for about 15 minutes before removing it.
Slice and serve once it’s cooled to room temperature, or slightly warm if you can’t wait that long.
Pro Tips
A few small details that make a real difference here.
- Dice your apples small. Large chunks take longer to soften and can make the cake harder to slice cleanly.
- Don’t peel the apples if you don’t want to. The skin softens completely during baking and adds a little extra texture and color.
- Use a firmer apple variety. Honeycrisp or Granny Smith hold their shape better than softer varieties like Red Delicious.
- Don’t skip the cooling time. Cutting into the cake too soon can cause it to fall apart, since it’s still setting as it cools.
- Test for doneness in multiple spots. Apple cake can have moist pockets from the fruit, so check a couple of different areas with your toothpick before pulling it out.
- Let the cake fully cool before slicing if possible. It firms up as it cools, which makes for cleaner, more even slices.
Substitutions and Variations
- Want it nuttier? Fold in ½ cup chopped walnuts or pecans along with the apples.
- No nutmeg on hand? Just use a little extra cinnamon instead, or add a pinch of allspice.
- Want a streusel topping? Mix together butter, flour, and brown sugar, then sprinkle it over the batter before baking for added texture.
- Want it dairy-free? This recipe is already dairy-free as written, since it uses oil instead of butter.
- Gluten-free version? Swap the all-purpose flour for a 1:1 gluten-free baking blend. The texture holds up well with this swap.
Make Ahead Tips
This cake actually tastes better the next day, once the flavors have had time to settle in.
Bake it a day or two ahead and store it covered at room temperature.
You can also bake it further in advance and freeze it, then thaw it the day before you need it.
Nutritional Info & Diet Swaps
One slice (this recipe makes about 12 slices) comes out to roughly 280 calories, depending on the exact size of the slice and type of apples used.
For a lighter version: Reduce the oil slightly and replace part of it with unsweetened applesauce, which keeps the cake moist while cutting some fat.
For a lower sugar version: Cut the granulated sugar down by a few tablespoons, since the apples themselves add natural sweetness too.
Meal Pairing Suggestions
This cake works well as a dessert, but it’s equally good for breakfast or an afternoon snack.
- Coffee or chai: The warm spices in the cake pair naturally with both.
- A scoop of vanilla ice cream: Turns this into more of a dessert centerpiece.
- A dollop of whipped cream: A simple way to dress it up without much extra effort.
- A drizzle of caramel sauce: Leans further into the cozy, fall dessert feel.
Time-Saving Tips
- Use a food processor to quickly dice the apples instead of cutting them by hand.
- Mix the dry ingredients ahead of time and store them in a container until you’re ready to bake.
- Use a bundt pan to skip the need for a separate glaze or decoration, since the shape alone looks finished.
Leftovers and Storage
Store the cake covered at room temperature for up to 3 days, or in the fridge for up to a week.
It also freezes well for up to 3 months. Wrap it tightly in plastic wrap, then foil, before freezing.
Thaw at room temperature for a few hours before serving.
FAQ
Do I need to peel the apples first? No, the skin softens completely during baking and is totally fine to leave on.
Why did my cake sink in the middle? This usually means it was underbaked, or the oven door was opened too early during baking. Check for doneness with a toothpick in multiple spots before removing it.
Can I make this in a different pan size? Yes, just adjust the baking time accordingly. A bundt pan typically needs a bit longer than a 9×13 pan.
Can I add raisins or dried cranberries? Absolutely, about ½ cup folded in with the apples works well without changing the texture much.
How do I know which apples are best for baking? Firmer varieties like Honeycrisp, Granny Smith, or Braeburn hold their shape and texture best once baked.
Can I make this cake ahead for a holiday gathering? Yes, it’s actually a great make ahead option, since the flavor and texture both improve slightly after a day or two of resting.
Wrapping Up
This cake turned out to be everything a fall dessert should be, soft, moist, and full of warm cinnamon flavor in every bite.
A simple batter, a few diced apples, and about an hour in the oven. That’s genuinely the whole process.
Make this one for a weekend baking project, a potluck, or just because your kitchen could use that cinnamon smell drifting through it.
If you try this one, leave a comment below and let me know how it turned out, or which apple variety you used. I’d love to hear about it.