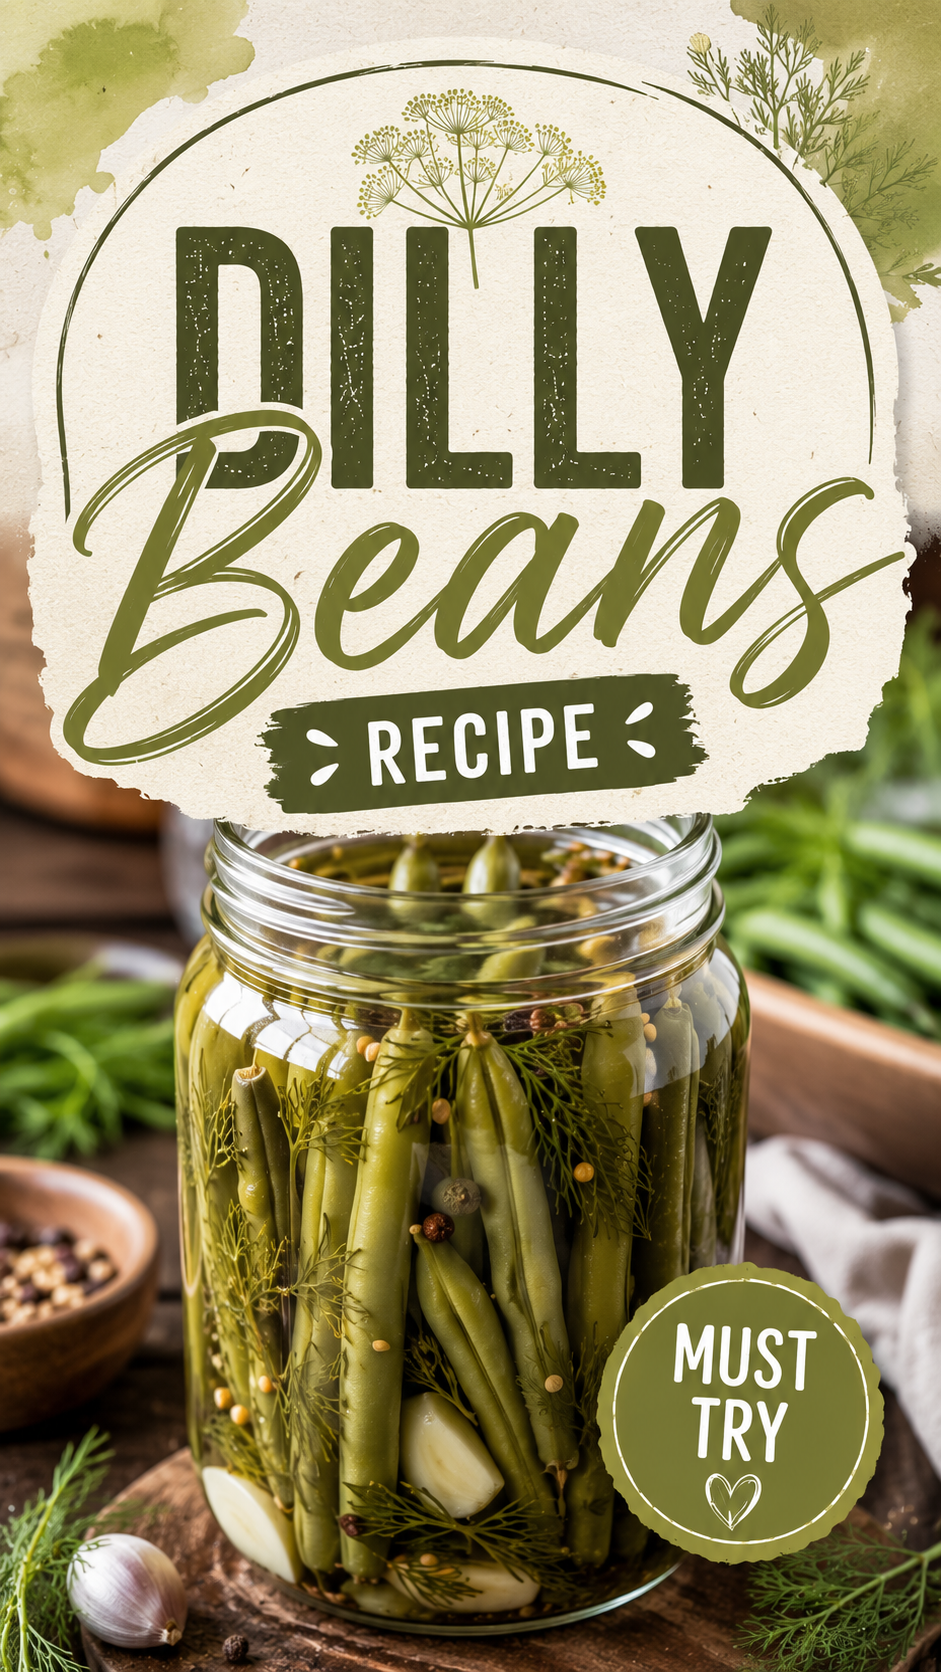
Pickled green beans sound like a strange combination until that first crunchy, tangy bite changes your mind completely.
I grew up thinking pickles only meant cucumbers. Then a neighbor handed me a jar of her dilly beans and I ate half of it standing at her kitchen counter.
These are crisp, garlicky, packed with dill flavor, and honestly addictive straight out of the jar.
No canning experience required. Just a pot, some jars, and about 20 minutes of actual hands on time.
Let’s get pickling.
What You’ll Need
Here’s everything for this batch:
- 1 pound fresh green beans, trimmed
- 4 cloves garlic, peeled
- 2 teaspoons mustard seeds
- 2 teaspoons black peppercorns
- 4 fresh dill heads (or 4 teaspoons dried dill)
- 2 cups white vinegar
- 2 cups water
- 3 tablespoons kosher salt
- 1 teaspoon red pepper flakes (optional)
Nine ingredients, most of which live in your pantry already.
Tools You’ll Need
- 4 pint sized mason jars with lids
- Canning funnel
- Small saucepan
- Tongs
- Cutting board
- Sharp knife
- Clean kitchen towel
Pro Tips
I’ve made dozens of batches of these over the years, and here’s what actually makes the difference:
- Pick beans that are firm and snap easily. Soft or bendy beans turn mushy once pickled. A good snap means a good crunch later.
- Trim beans to fit your jars with a little room at the top. Leave about half an inch of space below the rim so the brine covers everything completely.
- Don’t skip the ice bath. A quick dunk in ice water after trimming keeps the beans extra crisp once they hit the hot brine.
- Use fresh dill heads if you can find them. They add a completely different depth of flavor compared to dried dill, though dried works fine in a pinch.
- Wait the full week before eating. I know it’s tempting to dig in right away, but the flavor genuinely needs time to develop fully.
How to Make Dilly Beans
Here’s the full process from start to finish.
Step 1: Prep the beans
Wash the green beans and trim the stem ends.
Cut them to fit your jars, leaving about half an inch of space below the rim.
Step 2: Ice bath
Fill a bowl with ice water.
Blanch the beans in boiling water for 1 minute, then immediately transfer them to the ice bath. Let them sit for 2 minutes, then drain.
Step 3: Pack the jars
Add 1 clove of garlic, 1/2 teaspoon mustard seeds, 1/2 teaspoon peppercorns, and 1 dill head to each jar.
Pack the beans upright into the jars as tightly as possible without crushing them.
Step 4: Make the brine
In a small saucepan, combine the vinegar, water, and salt.
Bring to a boil, stirring until the salt fully dissolves.
Step 5: Fill the jars
Carefully pour the hot brine over the beans, leaving about a quarter inch of space at the top.
Add a pinch of red pepper flakes to each jar if using.
Step 6: Seal and cool
Wipe the rims clean, then seal the jars with their lids.
Let the jars cool to room temperature on the counter.
Step 7: Refrigerate and wait
Once cooled, transfer the jars to the fridge.
Let them sit for at least 1 week before eating for the best flavor.
Substitutions and Variations
Dilly beans are easy to adjust based on what you like. Here are some swaps worth trying:
| Original | Swap | Notes |
|---|---|---|
| White vinegar | Apple cider vinegar | Adds a slightly sweeter, fruitier tang |
| Mustard seeds | Coriander seeds | Milder, slightly citrusy flavor |
| Red pepper flakes | 1 whole fresh chili per jar | Adds sharper, more direct heat |
| Fresh dill | Dried dill | Convenient swap, slightly less bright flavor |
| Garlic cloves | Roasted garlic | Adds a mellow, sweeter garlic flavor |
Want a smokier version? Add a few slices of jalapeño along with a pinch of smoked paprika to the brine.
Make Ahead Tips
This entire recipe is essentially a make ahead project. The beans need at least a week in the fridge before they’re ready to eat, so plan accordingly if you want them for a specific event.
They actually get better with time. Many people prefer the flavor after 2 to 3 weeks rather than right at the one week mark.
Additional Details
Nutritional breakdown (per 1/4 cup serving):
- Calories: approximately 15
- Protein: 1g
- Fat: 0g
- Carbs: 3g
Diet friendly swaps:
- This recipe is naturally vegan, gluten-free, and low calorie as written
- For a lower sodium version, reduce the salt slightly, though this may shorten shelf life
Time saving tip: Trim and blanch a double batch of beans at once, then split them between two sets of jars with different spice combinations. Same effort, two different flavor profiles.
What to Serve Them With
Dilly beans work well in more places than just a snack bowl.
Try them:
- Dropped into a Bloody Mary as a garnish
- Chopped into a potato salad for extra tang
- Alongside a cheese and charcuterie board
- Straight out of the jar with a sandwich on the side
Leftovers and Storage
Store sealed jars in the fridge for up to 2 months.
Once opened, keep the jar refrigerated and use within 3 to 4 weeks for the best texture and flavor.
These are refrigerator pickles, not shelf stable canned goods, so they need to stay cold the entire time.
FAQ
Do I need special canning equipment for this recipe?
No. Since these are refrigerator pickles rather than shelf stable canned goods, you don’t need a water bath canner or pressure canner. Just clean jars and lids.
Why did my beans turn out soft instead of crunchy?
This usually happens from skipping the ice bath or using beans that weren’t fresh and firm to begin with. Both steps matter for keeping that crisp texture.
Can I use frozen green beans instead of fresh?
Fresh works much better here. Frozen beans have already broken down slightly, which leads to a mushier final texture.
How spicy are these if I add the red pepper flakes?
Just a gentle warmth in the background, not overwhelming heat. Add a whole fresh chili per jar instead if you want something spicier.
Can I reuse the brine for a second batch of beans?
It’s not recommended. The brine loses some of its acidity and flavor strength after the first use, which affects both taste and safety.
Wrapping Up
Dilly beans turn a plain vegetable into something people actually fight over at a party.
Crunchy, garlicky, and tangy in exactly the right way, these are worth the week long wait every single time.
Give this recipe a try this week and let me know how your batch turned out in the comments below.
And if you added your own twist, extra spice, a different vinegar, a bit more garlic, share it below too. I’d genuinely love to hear what you came up with.