Green peppers get treated like the boring vegetable in the produce aisle, and honestly, that’s a little unfair.
I used to think the same thing until I started cooking them the right way. Hot pan, a little oil, and just enough time for the edges to char and turn slightly sweet.
That’s when green peppers stop tasting bitter and start tasting incredible.
This sautéed green pepper and onion recipe turned into my go-to side dish for basically everything. Steak night, taco Tuesday, breakfast scrambles, it works with all of it.
15 minutes, one pan, and a dish that somehow tastes way more impressive than the effort it actually takes.
What You’ll Need
Here’s everything for this recipe:
- 4 large green bell peppers, sliced into strips
- 1 large yellow onion, sliced
- 3 tablespoons olive oil
- 3 cloves garlic, minced
- 1 teaspoon cracked black peppercorns (or 1/2 teaspoon ground black pepper)
- 1/2 teaspoon salt
- 1/2 teaspoon smoked paprika (optional)
- 1 tablespoon balsamic vinegar
Eight ingredients, and most of them you probably already have.
Tools You’ll Need
- Large skillet
- Cutting board
- Sharp knife
- Tongs
- Wooden spoon or spatula
Pro Tips
I’ve made this dish more times than I can count, and here’s what actually separates a great batch from a soggy one:
- Slice your peppers and onions the same thickness. Uneven pieces cook unevenly, which means some parts burn while others stay raw. Aim for strips about 1/4 inch wide.
- Don’t crowd the pan. Peppers release a lot of moisture, and an overcrowded skillet steams them instead of giving you that char you actually want. Use a large pan or cook in batches.
- Let them sit undisturbed for a few minutes at a time. Constant stirring keeps them from developing color. Give them space to actually sear.
- Add the garlic near the end, not the beginning. Garlic burns fast over high heat. Toss it in during the last minute or two so it stays fragrant instead of bitter.
- Finish with the balsamic off the heat. Adding it while the pan is still hot lets it reduce into a glossy, slightly sweet coating that ties everything together.
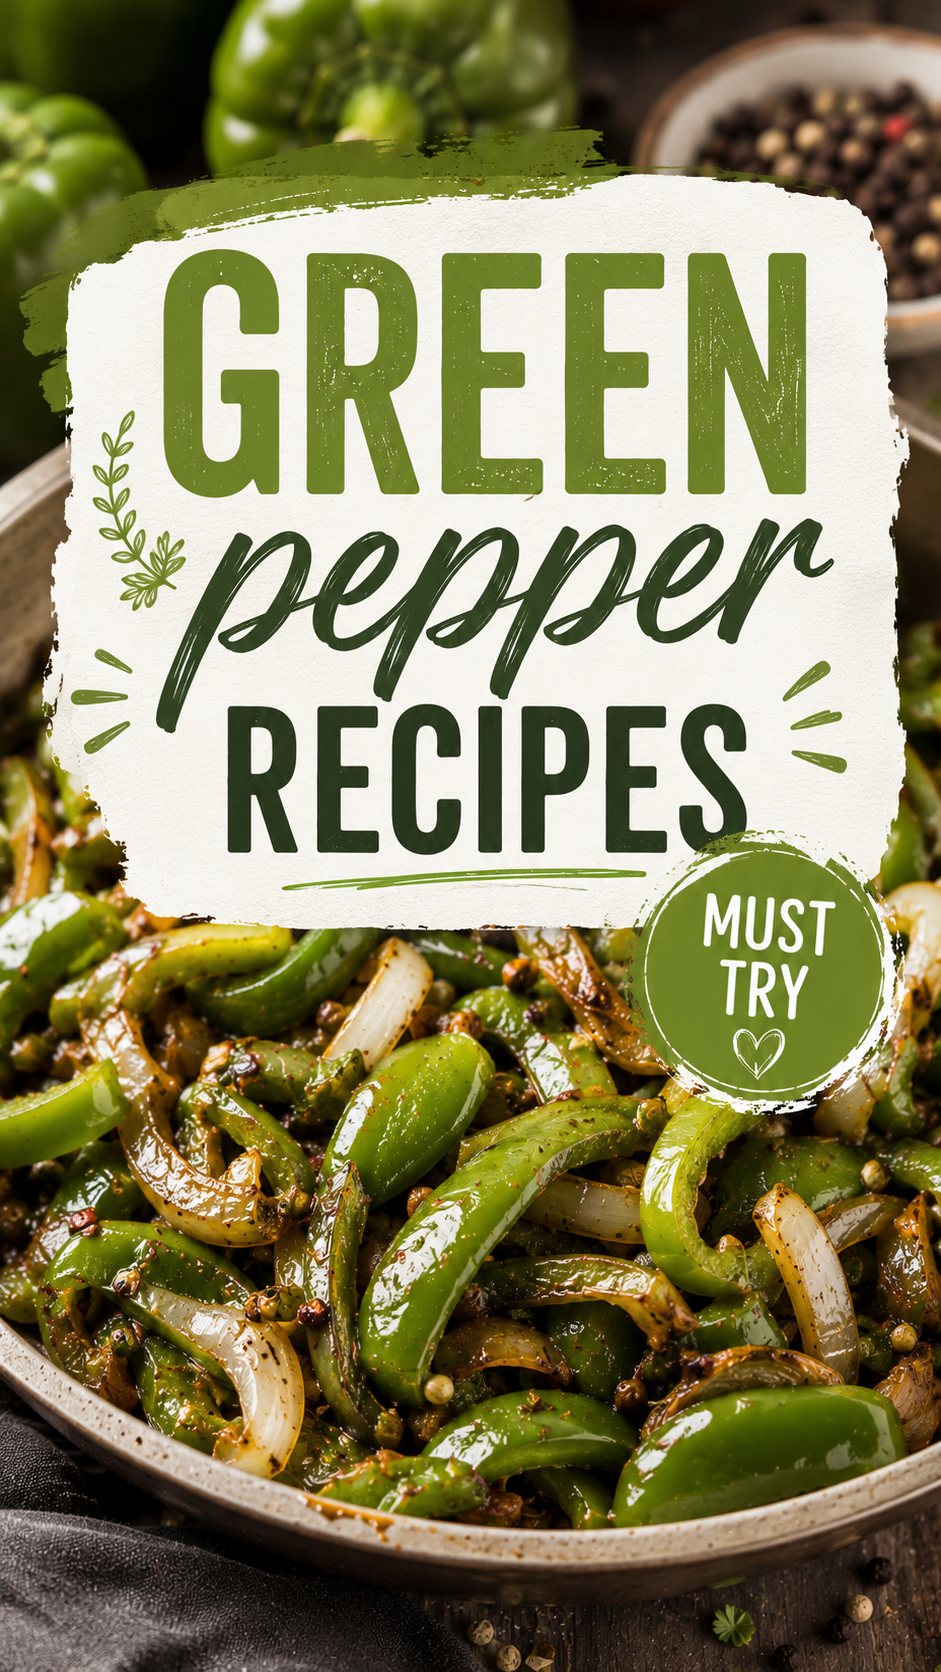
How to Make Sautéed Green Peppers and Onions
Here’s the full process, start to finish.
Step 1: Prep your vegetables
Wash the green peppers, then slice them into strips, removing the stem, seeds, and core.
Peel and slice the onion into similarly sized strips.
Step 2: Heat the pan
Heat the olive oil in a large skillet over medium-high heat until it shimmers.
Step 3: Add the peppers and onions
Add the sliced peppers and onions to the hot pan in a single layer.
Let them cook undisturbed for 3 to 4 minutes until the bottoms start to char slightly.
Step 4: Season and continue cooking
Stir, then let them cook undisturbed again for another 3 to 4 minutes.
Sprinkle in the cracked peppercorns, salt, and smoked paprika if using.
Step 5: Add the garlic
Add the minced garlic during the final 1 to 2 minutes of cooking, stirring frequently so it doesn’t burn.
Cook until the peppers are tender with slightly charred edges and the onions are golden.
Step 6: Finish and serve
Remove the pan from heat and drizzle with balsamic vinegar.
Toss everything together and serve warm.
Substitutions and Variations
This dish adapts well depending on what you have or how you’re serving it. Here are some swaps worth trying:
| Original | Swap | Notes |
|---|---|---|
| Green bell peppers | Red or yellow bell peppers | Sweeter flavor, less bitterness |
| Yellow onion | Red onion | Slightly sharper, more colorful |
| Balsamic vinegar | Soy sauce | Adds a savory, umami finish instead |
| Smoked paprika | Cajun seasoning | Adds a spicier, bolder kick |
| Olive oil | Butter | Adds richness, great for a steakhouse style version |
Want to turn this into a full meal? Add sliced sausage or chicken directly to the pan during the last few minutes of cooking.
Make Ahead Tips
You can slice the peppers and onions up to a day ahead. Store them in an airtight container in the fridge until you’re ready to cook.
I wouldn’t cook the full dish too far in advance though. It’s best served fresh, while the edges are still slightly crisp and charred.
Additional Details
Nutritional breakdown (per serving, based on 4 servings):
- Calories: approximately 110
- Protein: 2g
- Fat: 7g
- Carbs: 11g
Diet friendly swaps:
- This recipe is naturally vegan, gluten-free, and low carb as written
- For a lower fat version, reduce the olive oil to 2 tablespoons and use a nonstick pan
Time saving tip: Buy pre-sliced bell peppers and onions from the grocery store produce section during busy weeks. It cuts your prep time down to almost nothing.
What to Serve It With
This dish is incredibly versatile, which is part of why it shows up in my kitchen so often.
Try it with:
- Grilled steak or chicken
- Scrambled eggs for a savory breakfast
- Folded into a warm tortilla with cheese
- Piled on top of a sausage in a bun
It also works as a topping for rice bowls or a base layer under a pan seared piece of fish.
Leftovers and Storage
Store leftovers in an airtight container in the fridge for up to 4 days.
Reheat in a skillet over medium heat for a few minutes to bring back some of that char. The microwave works too, though you’ll lose some texture.
To freeze, portion into freezer safe bags and store for up to 2 months. Thaw in the fridge overnight before reheating.
FAQ
Why do my green peppers taste bitter?
Green peppers are naturally less sweet than red or yellow ones since they’re picked before fully ripening. Cooking them at high heat until slightly charred helps mellow out that bitterness significantly.
Can I roast these instead of sautéing them?
Yes. Toss with olive oil and seasoning, then roast at 425°F for 20 to 25 minutes, stirring halfway through.
Why did my peppers turn out soggy instead of charred?
This almost always comes from overcrowding the pan or stirring too often. Give them space and let them sit undisturbed for a few minutes at a time.
Can I make this dish ahead for meal prep?
Yes, it reheats well for a few days. Just know the texture softens slightly compared to serving it fresh off the stove.
What’s the best pan to use for this recipe?
A large stainless steel or cast iron skillet works best. Both handle high heat well and help develop that charred exterior.
Wrapping Up
Green peppers deserve way more credit than they usually get, and this recipe proves exactly why.
Charred, slightly sweet, and endlessly versatile, this dish earns a permanent spot in my weekly rotation.
Give this recipe a try this week and let me know how it turned out in the comments below.
And if you added your own twist, a different protein, extra spice, share it below too. I’d genuinely love to hear what you came up with.