Vanilla caramel ice cream that fits into a high protein, low sugar day sounds like it shouldn’t be possible, but this base proves otherwise.
I started making this version when I wanted something simple and classic that still hit real protein numbers. A smooth vanilla protein base gets spun into something creamy and rich, finished with a drizzle of sugar free caramel that makes it taste like a genuine treat instead of a protein shake in disguise.
It’s the flavor I come back to most, since it’s simple enough to enjoy any night of the week.
Let’s freeze and spin.
What You’ll Need
- 1 cup milk (dairy or unsweetened almond milk)
- ½ cup plain Greek yogurt
- 1 scoop vanilla protein powder
- 1 tbsp sugar free vanilla pudding mix (optional, for extra creaminess)
- ½ tsp vanilla extract
- Pinch of salt
- 2 to 3 tbsp sugar free caramel sauce, for drizzling
A short list of ingredients that turns into something that tastes like real vanilla ice cream while packing in real protein.
Tools You’ll Need
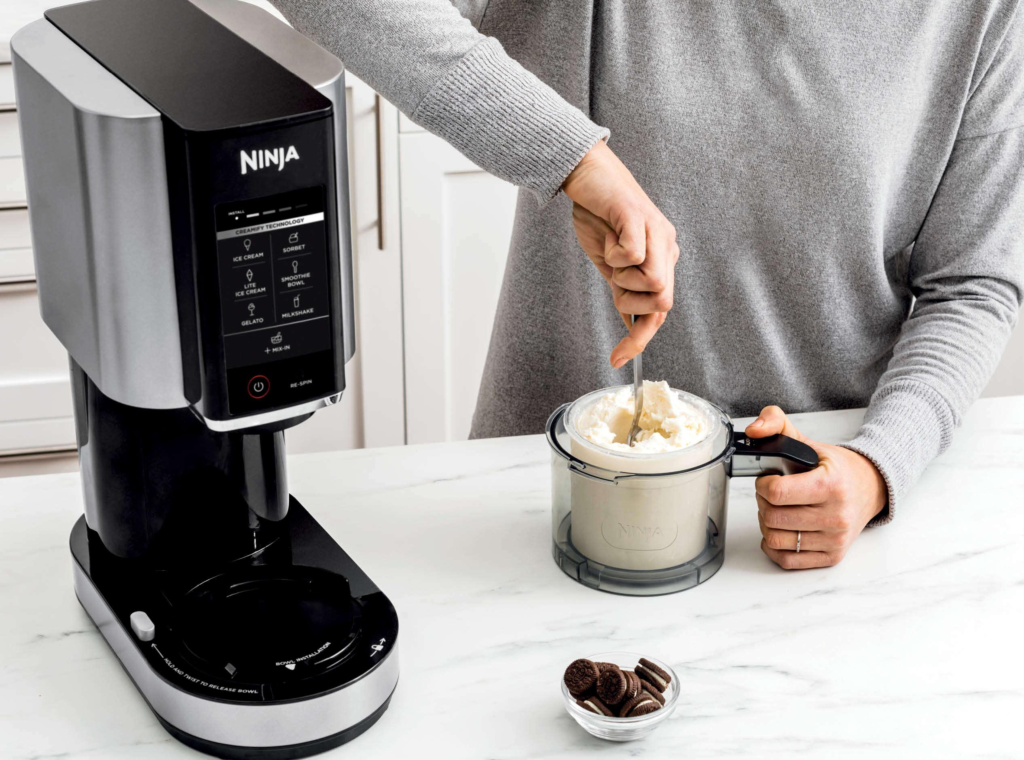
- Ninja Creami machine
- Ninja Creami pint container
- Mixing bowl
- Whisk
- Rubber spatula
- Small squeeze bottle, for drizzling caramel
Pro Tips
I’ve run this recipe through the Creami enough times to know exactly what makes it turn out right.
1. Freeze the base for a full 24 hours. Anything less and the machine struggles to process it into a smooth texture.
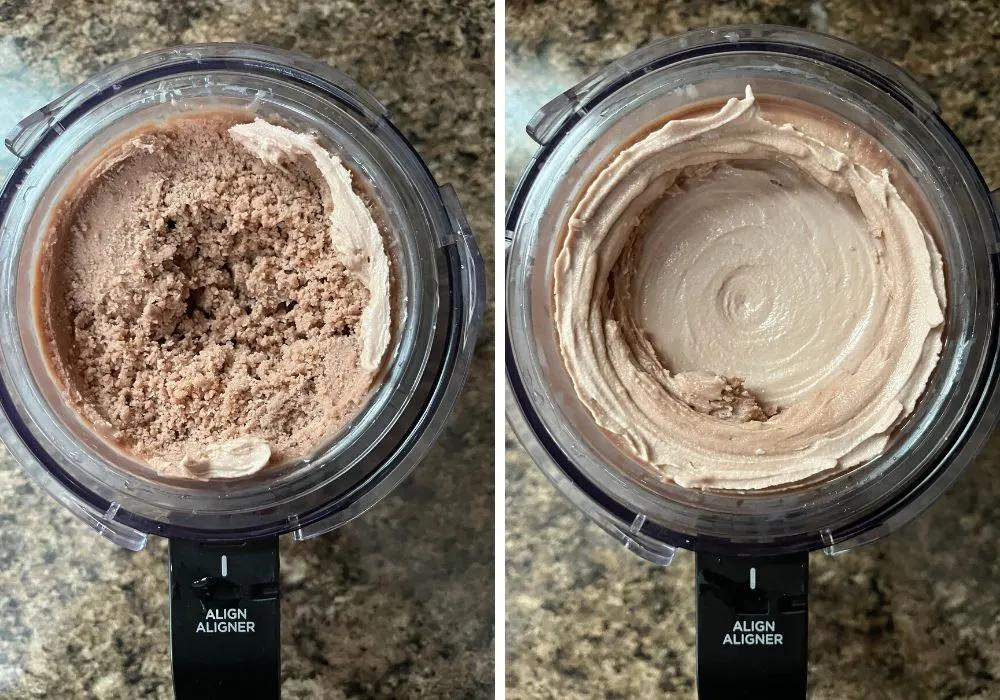
2. Don’t skip the respin cycle if it looks powdery. The first spin sometimes looks crumbly instead of creamy. Run it through the respin cycle once and it smooths right out.
3. Use full fat or 2% Greek yogurt for the creamiest texture. Nonfat versions can turn icier once frozen instead of staying smooth and scoopable.
4. Warm the caramel sauce slightly before drizzling. This makes it easier to swirl in cleanly instead of clumping on top.
5. Let the pint sit for a couple minutes after freezing before spinning. Straight from a deep freeze, it can be almost too hard for the blade. A short rest at room temperature helps.
How to Make Vanilla Caramel Ninja Creami
Step 1: Mix the Base
In a bowl, whisk together the milk, Greek yogurt, protein powder, pudding mix if using, vanilla extract, and salt until smooth.
Step 2: Freeze
Pour the mixture into your Ninja Creami pint container.
Freeze for a full 24 hours on a flat surface in the freezer.
Step 3: Spin
Remove the pint from the freezer. Let it sit for 2 to 3 minutes if it feels rock solid.
Place it into the Ninja Creami machine and run the “ice cream” function.
Step 4: Check the Texture
If the mixture looks crumbly or powdery after the first spin, run the “respin” cycle once more.
Step 5: Drizzle and Serve
Warm the sugar free caramel sauce slightly and drizzle it over the top.
Swirl gently with a spoon and serve immediately.
Substitutions and Variations
- Chocolate fudge version: Add 2 tablespoons cocoa powder to the base and drizzle with sugar free chocolate sauce instead of caramel.
- Peanut butter chocolate chip version: Add 2 tablespoons peanut butter powder to the base and mix in sugar free mini chocolate chips after spinning.
- Cookies and cream version: Skip the caramel and mix in crushed chocolate sandwich cookies after spinning instead.
- Dairy free: Use a dairy free yogurt alternative and a plant based protein powder.
- Extra protein: Add an additional half scoop of protein powder, adjusting the milk slightly if the mixture becomes too thick.
Make Ahead Tips
This recipe basically requires make ahead planning since the base needs 24 hours in the freezer before spinning.
Make multiple pints at once in different flavors, so you always have a high protein treat ready whenever a craving hits.
Nutritional Breakdown (Per Serving, Serves 2)
| Nutrient | Amount |
|---|---|
| Calories | 190 |
| Fat | 4g |
| Carbs | 15g |
| Sugar | 5g |
| Protein | 22g |
Numbers will shift depending on the exact protein powder and caramel sauce used.
Diet Friendly Swaps
- Sugar free: Use a sugar free protein powder and sugar free caramel sauce, which this recipe already leans toward.
- Dairy free: Use a dairy free yogurt, plant based milk, and check your caramel sauce for dairy free options.
- Higher protein: Increase the protein powder slightly, adjusting liquid as needed for the right consistency.
Meal Pairing Suggestions
Serve as a post workout treat alongside a glass of water or an electrolyte drink.
This also works well as a satisfying dessert after a lighter, protein focused dinner.
Cooking Time Efficiency Tips
Make several base flavors at once during a weekend prep session, so you always have a pint ready to spin during the week without starting from scratch.
Keep a bottle of sugar free caramel sauce on hand so topping is ready to go without extra prep each time.
Leftovers and Storage
Once spun, this is best eaten within a day or two for the softest texture.
If you have leftovers, refreeze the pint and simply respin before serving again to restore that creamy texture.
Unspun base mixture keeps well in the freezer for up to 2 months.
FAQ
Do I need the exact Ninja Creami pint container? Yes, the machine is designed specifically for its own containers, so a regular container won’t work with the spinning mechanism.
Why did my ice cream come out icy instead of creamy? This usually means the base needs more fat, like using full fat yogurt instead of nonfat, which helps keep the texture soft once frozen.
Can I make this recipe without protein powder? Yes, simply omit it and adjust the milk slightly if the mixture becomes too thin, though the protein content will be significantly lower.
How long does the spin cycle actually take? Each cycle usually takes under 2 minutes, which is part of what makes this machine so convenient.
Can I double this recipe? You’ll need a second pint container since each one holds a set amount, but doubling the base recipe itself works fine.
Wrapping Up
This vanilla caramel Ninja Creami base proves that a genuinely satisfying treat can still hit real protein numbers, and once you get the ratio down, you can rotate through flavors like chocolate fudge, peanut butter chocolate chip, and cookies and cream all using the same basic method.
It’s the kind of recipe that makes protein goals feel like dessert instead of a chore.
Try this recipe, then come back and tell me how it turned out. Did you try the chocolate fudge version? Add mix-ins? Drop a comment below, I’d love to hear about it. 🍦