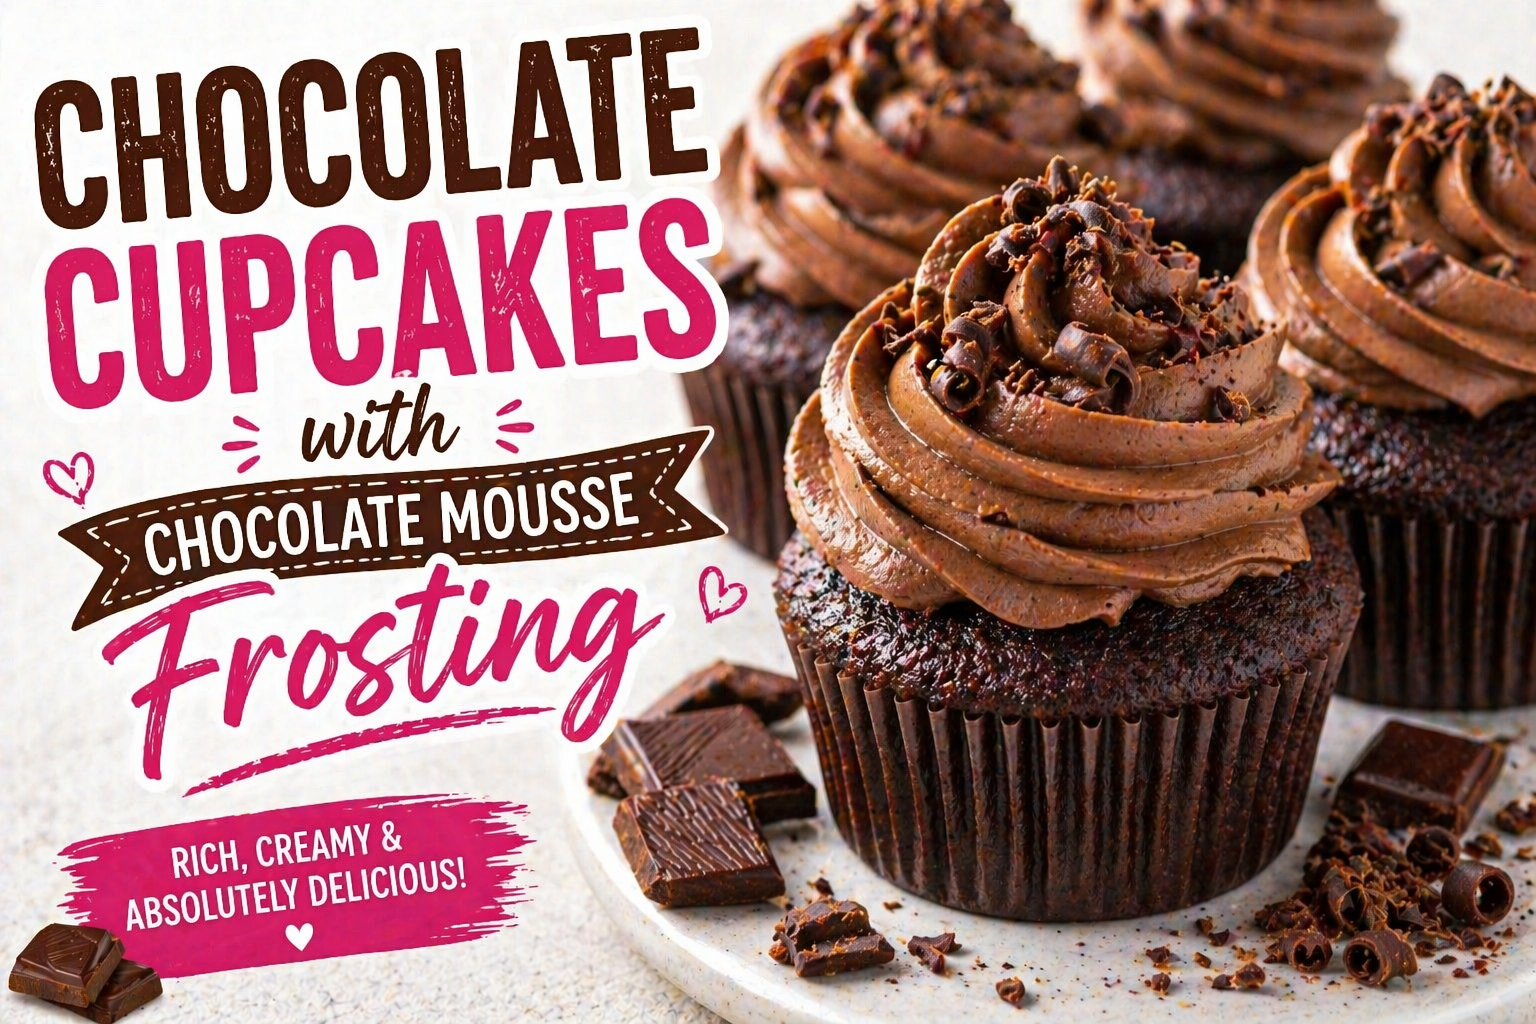
A good chocolate cupcake should taste like chocolate from the very first bite. These chocolate cupcakes with chocolate mousse frosting bring together a soft cocoa cake and a cloud-like topping made with real melted chocolate and freshly whipped cream.
The cupcake itself has a familiar, rich chocolate flavor. Then comes the mousse-style frosting, which adds a smooth, creamy finish without the heavier texture of traditional buttercream.
It’s a combination that feels special enough for a birthday party but simple enough for an ordinary afternoon when a chocolate craving hits.
The batter starts with pantry staples such as flour, cocoa powder, sugar, eggs, and milk. Melted butter adds richness, while baking powder and baking soda help the cupcakes rise.
For the topping, you only need heavy cream, chocolate, and a little powdered sugar.
There is one detail that makes this frosting worth handling carefully: the temperature of the chocolate. If it is too warm, it can soften the whipped cream. If it gets too cold, it can harden into tiny bits before mixing evenly.
Once you understand that step, the method becomes much easier to follow.
These cupcakes are lovely with coffee, cold milk, or fresh berries. They’re also easy to dress up with chocolate shavings when you want a more polished dessert.
Let’s go through the ingredients, techniques, and little details that help make this chocolate dessert a success.
Why You’ll Love These Chocolate Cupcakes with Chocolate Mousse Frosting
Two chocolate textures in one dessert. The cupcakes have a tender, cake-like crumb, while the topping is softer and airier than traditional buttercream.
Made with real chocolate. Cocoa powder flavors the cake, and melted chocolate gives the frosting a smooth, rounded chocolate taste.
No complicated decorations needed. A swirl of frosting and a few chocolate shavings are enough to create an elegant finish.
Great for celebrations. Individual portions make cupcakes convenient for birthdays, dessert tables, and family gatherings.
Simple baking ingredients. Most of the cupcake ingredients are everyday baking staples, so you don’t need a long shopping list.
Easy to customize. You can experiment with different chocolates, add a little filling, or finish the cupcakes with berries.
A less buttery frosting. Instead of a butter-based topping, this recipe uses whipped cream. The texture is lighter, although the frosting is still a rich dessert.
Perfect for chocolate lovers. Chocolate appears in both layers, making the flavor the main attraction rather than an afterthought.
What You’ll Need
There are two main components to this recipe: the chocolate cupcakes and the chocolate mousse-style frosting.
The cupcake batter combines dry baking ingredients with melted butter, sugar, eggs, vanilla, and milk.
The frosting uses whipped cream and melted chocolate to create its soft texture.
Understanding what each ingredient does will make it easier to prepare the recipe and spot problems before they happen.
Ingredients for the Chocolate Cupcakes
All-Purpose Flour
All-purpose flour provides the structure that holds the cupcakes together.
It has enough protein to create a stable cake, but you still need to mix it gently to avoid developing too much gluten.
For accurate results, spoon flour into your measuring cup and level the top.
Packing flour into the cup can add more than you intend and produce dry, dense cupcakes.
Unsweetened Cocoa Powder
Cocoa powder gives the cupcakes their deep chocolate flavor.
Use unsweetened cocoa powder, not sweetened hot chocolate mix.
Natural cocoa powder is a sensible starting point for this batter because the recipe includes baking soda. Dutch-process cocoa can behave differently with leavening ingredients, so that substitution should be tested rather than assumed.
Baking Powder
Baking powder helps create lift in the batter.
As the cupcakes bake, it releases gas that helps them rise and develop a softer crumb.
Check that your baking powder is fresh before starting.
Baking Soda
Baking soda also contributes to rising and browning.
Its behavior depends partly on the acidity of the other ingredients.
The original recipe uses both baking powder and baking soda, so preserve the given measurements rather than increasing either one.
Salt
Salt balances the sweetness and helps bring out the cocoa flavor.
Even in a sweet dessert, a small amount can make chocolate taste more complete.
Wet Ingredients for the Cupcakes
Melted Butter
Melted butter adds richness and a pleasant buttery flavor.
Let it cool slightly before combining it with eggs.
Butter that is too hot can affect the eggs and make the mixture harder to combine smoothly.
Granulated Sugar
Sugar provides sweetness and influences how the cupcakes brown and hold moisture.
It also helps balance the natural bitterness of cocoa powder.
Use the amount given in the recipe card rather than adjusting it before your first baking test.
Eggs
Eggs help bind the cupcake batter and contribute to its structure.
They also help the ingredients combine into a more uniform mixture.
Using eggs closer to room temperature makes mixing with melted butter easier.
Vanilla Extract
Vanilla rounds out the chocolate flavor.
It shouldn’t overpower the cocoa. Instead, it adds a subtle background note that makes the cupcakes taste more balanced.
For strict halal preferences, choose an alcohol-free vanilla flavoring.
Milk
Milk provides moisture and helps the flour and cocoa combine into a scoopable batter.
Whole milk gives a richer result, although the original recipe doesn’t specify a milk-fat percentage.
If you change the type of milk, the texture may differ slightly.
Ingredients for the Chocolate Mousse Frosting
Heavy Whipping Cream
Heavy cream is the foundation of the frosting’s airy texture.
When chilled cream is whipped, it traps air and increases in volume.
For the best chance of a stable frosting, use cold heavy whipping cream with enough fat to whip properly.
Avoid substituting regular milk or half-and-half, which will not whip in the same way.
Melted Chocolate
Real chocolate gives the frosting its flavor and body.
Semi-sweet chocolate is a useful starting point because it balances sweetness and cocoa intensity.
Dark chocolate can create a stronger flavor, while milk chocolate produces a sweeter topping and may affect firmness.
The chocolate needs to be melted smoothly and cooled to a suitable temperature before it meets the whipped cream.
Powdered Sugar
Powdered sugar adds a little sweetness to the cream.
Because it dissolves easily, it won’t leave the same grainy texture that ordinary granulated sugar might produce.
Optional Chocolate Shavings
Chocolate shavings add a final touch of texture and make the cupcakes look more finished.
Use a vegetable peeler or fine grater to prepare them from a chocolate bar.
Add them shortly before serving for the neatest appearance.
The exact measurements are listed in the printable recipe card.
Tools You’ll Need
A few basic baking tools are enough to make the cupcakes and frosting.
Standard Muffin Pan
A regular muffin pan keeps the cupcake liners upright and supports the batter while it bakes.
Paper Cupcake Liners
Liners make the cupcakes easier to remove and serve.
Choose standard-size liners to match the pan.
Large and Medium Mixing Bowls
Use one bowl for the dry ingredients and another for the wet ingredients.
A separate clean bowl is helpful for whipping the cream.
Whisk
A whisk distributes the flour, cocoa, baking powder, baking soda, and salt evenly.
It also helps combine the cupcake’s wet ingredients.
Electric Hand Mixer
An electric mixer makes whipping heavy cream easier and more consistent.
A stand mixer with a whisk attachment can also work.
Rubber Spatula
A flexible spatula is useful for folding ingredients together without overmixing.
It’s especially important when incorporating chocolate into whipped cream.
Microwave-Safe Bowl or Double Boiler
You’ll need a gentle way to melt the chocolate.
Use short microwave intervals or a heatproof bowl over barely simmering water.
Cooling Rack
A wire rack allows the baked cupcakes to cool more evenly.
Piping Bag and Tip
A piping bag helps create decorative frosting swirls.
However, a spoon or small offset spatula works perfectly well for a simpler look.
Pro Tips for the Best Chocolate Cupcakes
Good chocolate cupcakes depend on a few simple techniques.
The ingredients matter, but so does the way you mix, bake, cool, and frost them.
Measure the Flour and Cocoa Carefully
Too much flour or cocoa can make cupcakes dry.
Use a kitchen scale if you have one.
Otherwise, spoon the dry ingredients into the measuring cups and level the tops.
Don’t compress them.
Let Melted Butter Cool Slightly
Melted butter should still be liquid, but not hot.
If you pour very hot butter into eggs, it can affect their texture.
Give the butter a few minutes to cool before mixing.
Don’t Beat the Batter After Adding Flour
Once the flour mixture is incorporated, stop mixing.
Overmixing develops gluten and may produce a firmer cupcake.
A smooth-looking batter is useful, but there’s no need to beat it for several extra minutes.
Use Good-Quality Chocolate
Because the frosting has only a few ingredients, the chocolate’s flavor is noticeable.
Choose a chocolate you enjoy eating on its own.
Chocolate chips may contain stabilizers that affect melting, so a chopped chocolate bar can be easier to incorporate smoothly.
Keep the Cream Cold
Cold heavy cream whips more reliably.
You can also chill the mixing bowl and whisk briefly before starting.
If your kitchen is warm, work efficiently and return the frosting to the refrigerator when necessary.
Pay Attention to Chocolate Temperature
This is the most delicate part of the recipe.
The chocolate should be melted and smooth, then allowed to cool until it’s no longer warm to the touch but still fluid.
If it’s too hot, it can deflate the cream.
If it’s too cool, it may form small pieces when it touches the cold whipped cream.
Frost Only Completely Cooled Cupcakes
Warm cupcakes can melt the mousse-style frosting.
Even slightly warm cake may cause the frosting to slide or lose its decorative shape.
Let the cupcakes cool fully before piping.
How to Make Chocolate Cupcakes with Chocolate Mousse Frosting
The recipe has three stages: prepare the chocolate cupcake batter, bake and cool the cakes, then make and apply the frosting.
Working in that order gives the cupcakes time to cool while you prepare the topping.
Step 1: Preheat the Oven
Preheat the oven to approximately 350°F (175°C), close to the 180°C temperature in the original recipe.
Place the oven rack near the center.
Line a standard muffin pan with cupcake liners.
Make sure the liners sit neatly inside the cavities so the cupcakes hold their shape as they rise.
Step 2: Prepare the Dry Ingredients
In a large bowl, combine the flour, cocoa powder, baking powder, baking soda, and salt.
Whisk until the mixture is uniform.
This step helps distribute the cocoa and leavening ingredients throughout the batter.
If your cocoa powder contains hard lumps, sift it before mixing.
Step 3: Combine the Butter and Sugar
Melt the butter and allow it to cool until just warm.
Pour it into a separate mixing bowl.
Add the granulated sugar and whisk.
Because the butter is melted, the mixture may look slightly grainy rather than light and fluffy.
That’s normal for this method.
Step 4: Add the Eggs and Vanilla
Add the eggs to the butter and sugar mixture.
Whisk until combined.
Stir in the vanilla extract.
The mixture should look more uniform, although some sugar granules may still be visible.
Step 5: Add the Dry Ingredients and Milk
Add part of the dry mixture to the wet ingredients.
Pour in some of the milk and stir gently.
Continue adding the remaining dry ingredients and milk until everything is incorporated.
Stop when no obvious pockets of flour remain.
The batter should be smooth enough to portion into the liners.
Avoid prolonged mixing.
Step 6: Fill the Cupcake Liners
Spoon the batter into the prepared liners.
Fill each about three-quarters full, as suggested in the original recipe.
Try to keep the portions even.
That way, the cupcakes will bake at a similar rate.
The original ingredient list doesn’t specify an exact yield, so the number of cupcakes may vary depending on your pan and how heavily you fill each liner.
Step 7: Bake the Chocolate Cupcakes
Place the muffin pan in the preheated oven.
Bake for approximately 18 to 22 minutes, checking near the end of the suggested time.
The tops should appear set.
Insert a toothpick into the center of a cupcake.
It should come out without wet batter, although a few moist crumbs are fine.
If the center is still wet, continue baking in short intervals.
Step 8: Cool Completely
Remove the cupcakes from the oven.
Let them rest briefly in the pan before transferring them to a wire rack.
Allow them to cool completely.
This step matters because the frosting contains whipped cream and can soften quickly on warm cake.
Step 9: Melt the Chocolate
Chop the chocolate into small, even pieces.
Place it in a dry, microwave-safe bowl.
Microwave in short intervals, stirring between each one.
Stop when the chocolate is almost melted and let the remaining heat finish the job.
You can also melt chocolate gently using a double boiler.
Keep water and steam out of the chocolate.
Step 10: Cool the Melted Chocolate
Set the melted chocolate aside until it is no longer warm but remains pourable.
Stir occasionally to help it cool evenly.
Don’t refrigerate it until solid.
The goal is to bring the chocolate closer to the temperature of the whipped cream without allowing it to harden.
Step 11: Whip the Heavy Cream
Pour the cold heavy cream into a clean mixing bowl.
Add the powdered sugar.
Beat with an electric mixer until soft peaks form.
The cream should hold a gentle shape when the whisk is lifted, but it shouldn’t look grainy or separated.
Avoid overwhipping.
Step 12: Combine Chocolate and Whipped Cream
Begin by stirring a small spoonful of whipped cream into the cooled melted chocolate.
This helps lighten the chocolate before combining it with the rest of the cream.
Then gently fold the chocolate mixture into the remaining whipped cream.
Use broad, gentle motions.
Stop once the mixture looks evenly chocolate-colored.
Don’t beat the finished frosting vigorously.
If the chocolate begins forming little hard flecks, it may have cooled too much before mixing.
If the cream loses its volume, the chocolate may have been too warm or the mixture may have been overworked.
Step 13: Chill the Frosting Briefly if Needed
Check the consistency of the frosting.
If it holds a soft shape, it may be ready to use.
If it seems too loose for piping, refrigerate it briefly and reassess.
Chocolate mousse-style frosting may firm as the chocolate cools.
However, its final stability depends on the chocolate, cream, temperature, and mixing method.
Step 14: Frost the Cupcakes
Make sure the cupcakes are completely cool.
Transfer the frosting to a piping bag fitted with your preferred decorative tip.
Pipe a swirl onto each cupcake.
For a simpler finish, spread the frosting with a small spatula.
Avoid leaving the frosting at room temperature for long periods.
Step 15: Add Chocolate Shavings and Serve
Finish each cupcake with a few chocolate shavings, if desired.
Place the frosted cupcakes in the refrigerator until serving.
The finished dessert has two contrasting elements: soft chocolate cake underneath and an airy chocolate topping above.
Serve chilled or after only a brief period out of the refrigerator.
Prefer to Watch?
A visual demonstration can make frosting techniques easier to understand, especially when you’re learning to whip cream or work with melted chocolate.
Your supplied YouTube video covers whipped chocolate ganache frosting. That’s related to this recipe, but ganache frosting and the whipped-cream mousse-style frosting used here are not exactly the same.
For these cupcakes, follow the written mousse-style frosting instructions and ingredient amounts rather than substituting the video’s ganache method.
Ingredient Substitutions
Chocolate desserts offer plenty of room for small changes, but not every ingredient can be replaced without affecting the texture.
Here are the swaps that are most useful to understand.
All-Purpose Flour Alternatives
All-purpose flour is the most reliable choice for the original cupcake recipe.
A measured portion of cake flour may create a softer texture, but an exact substitution should be tested.
Whole wheat flour produces a more substantial crumb and changes how the batter absorbs moisture.
For gluten-free cupcakes, use a recipe developed specifically for gluten-free baking rather than assuming a direct flour replacement will behave identically.
Cocoa Powder Options
Unsweetened natural cocoa powder is the recommended starting point.
Dutch-process cocoa has a smoother, less acidic profile.
Because this recipe contains baking soda, changing cocoa type may influence the rise, so the result should be tested.
Avoid sweetened drinking chocolate as a direct substitute.
Butter Alternatives
Unsalted butter allows you to control the recipe’s salt level.
Salted butter can be used in some cupcake recipes, but it changes the total amount of salt.
An equal swap to oil would create a different batter and shouldn’t be assumed to produce the same result without testing.
Milk Substitutes
Whole milk adds richness, while lower-fat milk may give a slightly different texture.
Unsweetened dairy-free milk alternatives may work, but the results depend on the product.
Choose a suitable alternative and test before using it for an important event.
Chocolate for the Frosting
Semi-sweet chocolate provides a good balance between sweetness and chocolate intensity.
Dark chocolate creates a more pronounced cocoa flavor.
Milk chocolate is sweeter and can change the frosting’s firmness.
White chocolate has a different composition and would require its own frosting formula.
Heavy Cream Alternatives
Heavy whipping cream is essential to the original frosting method.
Regular milk cannot replace it because it does not have enough fat to whip into stable peaks.
For dairy-free frosting, use a recipe specifically developed around a suitable plant-based whipping product.
Powdered Sugar Alternatives
Powdered sugar dissolves easily into cold cream.
Granulated sugar may not dissolve as smoothly.
If you use a powdered sugar substitute, check that it is designed for frosting and whipped cream.
Chocolate Cupcake Variations
Once you understand the original recipe, you can experiment with different flavor combinations.
These ideas keep the chocolate cupcakes as the foundation while changing the finishing touches.
Double Chocolate Chip Cupcakes
Fold a small amount of chocolate chips into the batter.
The chips create little pockets of chocolate throughout the cupcake.
Keep the quantity modest so the batter still rises and bakes properly.
Dark Chocolate Mousse Frosting
Use a suitable dark chocolate instead of semi-sweet chocolate.
The flavor becomes more intense and less sweet.
Because different chocolates contain different cocoa butter and sugar levels, the frosting may need a little experimentation to get the texture right.
Chocolate Cupcakes With a Berry Center
Add a small amount of thick raspberry or strawberry filling to cooled cupcakes.
Cut a small opening in the center, spoon in the filling, and replace the cupcake top before frosting.
Avoid using a very runny filling, which can soak into the cake.
Chocolate Orange Cupcakes
A little finely grated orange zest can bring a bright citrus note to the chocolate flavor.
Add the zest to the cupcake batter or use it sparingly as a garnish.
Orange and chocolate make a lovely pairing when you want something different from plain chocolate.
Chocolate Cupcakes With a Cream Cheese Center
A small amount of sweetened cream cheese filling can create another layer of flavor.
Because the filling affects baking and storage, use a tested filled-cupcake formula rather than inserting large amounts into the original batter.
Chocolate Cupcakes With Crunchy Toppings
Instead of chocolate shavings, add finely chopped toasted nuts or chocolate curls just before serving.
These provide a contrast to the soft frosting.
Always check for allergies when serving guests.
Mini Chocolate Cupcakes
You can make a smaller version using a mini muffin pan.
However, the baking time will be shorter and the recipe yield will change.
Begin checking early and use the toothpick test rather than relying on standard-size baking time.
Common Mistakes to Avoid
Cupcakes and whipped chocolate frosting each have their own challenges.
Most problems come from inaccurate measurements, temperature differences, or mixing too aggressively.
1. Adding Too Much Flour
Excess flour makes cupcakes heavier and drier.
Measure carefully and avoid scooping flour directly into the cup.
A scale offers better consistency when you have one.
2. Using Hot Melted Butter
Very hot butter can affect the eggs and make the mixture difficult to combine smoothly.
Allow the butter to cool until it remains liquid but is no longer hot.
3. Overmixing the Batter
Mixing too long after adding flour can produce a firmer crumb.
Stir only until the ingredients come together.
You don’t need to beat the cupcake batter like whipped cream.
4. Overbaking the Cupcakes
Chocolate cupcakes can look darker long before they’re finished, which makes color a less reliable guide.
Check with a toothpick near the center.
Remove the cupcakes once there is no wet batter.
5. Adding Warm Chocolate to Whipped Cream
This is one of the biggest frosting mistakes.
Warm chocolate can deflate the whipped cream and leave the frosting loose.
Let the chocolate cool while keeping it fluid.
6. Adding Chocolate That Has Cooled Too Much
Chocolate that starts to set can form little lumps as soon as it touches cold whipped cream.
These aren’t necessarily harmful, but they prevent a perfectly smooth finish.
The best time to combine is when the chocolate is no longer warm yet still flows easily.
7. Overwhipping the Heavy Cream
Whipping cream beyond the desired stage can make it grainy.
Stop when soft peaks form for the original method.
After adding the chocolate, fold gently rather than continuing to beat vigorously.
8. Frosting Warm Cupcakes
Even a little residual warmth can soften the mousse-style topping.
Cool the cupcakes fully before decorating.
9. Leaving Frosted Cupcakes Unrefrigerated
The frosting contains heavy cream.
These cupcakes need to be refrigerated and should not sit out for extended periods.
10. Expecting the Frosting to Behave Like Buttercream
Buttercream generally holds piped shapes more firmly at room temperature.
A mousse-style whipped cream frosting is softer and more temperature-sensitive.
Use it for chilled cupcakes and choose a different frosting if the dessert must stay on a warm display table.
Make-Ahead Tips
Preparing cupcakes ahead of time can make celebrations much easier.
The key is to separate the baked cake from the delicate frosting until you’re ready to assemble.
Bake the Cupcakes a Day Ahead
Bake the cupcakes and let them cool completely.
Store the plain cupcakes in an airtight container.
For longer storage, refrigerate or freeze them.
Wait until closer to serving time to add the mousse-style frosting.
Prepare Chocolate in Advance
You can chop the chocolate ahead of time and store it in a sealed container in a cool, dry place.
Melt it only when you’re ready to make the frosting.
This reduces the chance of reheating and cooling the chocolate repeatedly.
Make the Frosting Closer to Serving
Whipped cream-based frosting has a more delicate structure than buttercream.
For the best piping texture, prepare it on the day you plan to serve the cupcakes when possible.
If making it ahead, refrigerate promptly and check its texture before using.
Decorate Shortly Before Serving
Chocolate shavings are a simple decoration that can be added near serving time.
They look especially neat on freshly piped frosting.
If you’re adding berries, pat them dry first so excess moisture doesn’t drip onto the topping.
Transport Cupcakes Cold
Use a cupcake carrier with individual wells.
Chill the frosted cupcakes before transporting them.
Keep them in a cooler or suitable insulated container when necessary.
A whipped cream frosting isn’t ideal for long journeys in a warm vehicle.
Nutrition Information
Chocolate cupcakes with chocolate mousse frosting are a rich dessert made with flour, sugar, butter, cocoa, eggs, milk, cream, and chocolate.
Their exact nutrition depends on the ingredients you choose, the cupcake size, the type of chocolate, and the amount of frosting on each cupcake.
Carbohydrates
Flour, sugar, and chocolate contribute carbohydrates.
The amount per cupcake will vary with the serving size and chocolate brand.
Fat
Butter, heavy cream, and chocolate provide most of the fat.
A mousse-style topping may feel lighter than buttercream, but that doesn’t necessarily mean it contains fewer calories or less fat.
Protein
Eggs, milk, cream, and flour contribute some protein.
However, these cupcakes are primarily a dessert rather than a protein-focused food.
Sugar
The recipe contains added sugar in both the cake and the frosting.
Chocolate may also contribute sugar depending on the type you use.
Cocoa
Unsweetened cocoa powder contains naturally occurring plant compounds, but this doesn’t turn the cupcakes into a health food.
Enjoy them as an occasional sweet treat in portions that suit your preferences.
Calories Per Cupcake
The calorie count should be calculated using the exact brands and amounts of ingredients and the confirmed recipe yield.
Don’t rely on a generic chocolate cupcake estimate, because mousse frosting can vary considerably in composition and serving size.
What to Serve With Chocolate Cupcakes
These cupcakes have enough chocolate flavor to stand on their own.
Still, the right drink or side can make them feel even more special.
Cold Milk
A glass of cold milk is a classic pairing.
It balances the richness of the chocolate cake and frosting.
Hot Coffee
Coffee complements cocoa flavor beautifully.
The slight bitterness of black coffee offers a contrast to the sweet frosting.
Iced Coffee
Iced coffee is an easy pairing for warm afternoons.
It works especially well when the cupcakes are served chilled.
Fresh Strawberries
Strawberries add a bright, juicy contrast to the chocolate.
Serve them beside the cupcakes or use a small berry as a garnish.
Raspberries
Raspberries bring a pleasantly tart flavor.
Their natural acidity helps balance the creaminess of the frosting.
Vanilla Ice Cream
For a more indulgent dessert plate, serve an unfrosted or lightly frosted cupcake alongside a small scoop of vanilla ice cream.
Unsweetened Tea
Black tea or a mild herbal tea can be a pleasant alternative to coffee.
Serving Tip: Because of the mousse frosting, keep the cupcakes refrigerated until you’re ready to present them.
Storage and Leftovers
Chocolate mousse frosting contains whipped cream, so these cupcakes need more careful storage than cupcakes topped with standard buttercream.
Keep them cold and avoid leaving them in a warm room.
How to Refrigerate Frosted Cupcakes
Arrange the cupcakes in a tall, airtight container so the lid doesn’t crush the frosting.
Refrigerate at 40°F (4°C) or below.
For the best quality, enjoy them within 2 to 3 days.
The frosting may gradually soften or lose some volume during storage.
Can You Store Them at Room Temperature?
Because of the heavy cream topping, don’t store frosted cupcakes on the counter overnight.
For serving, return leftovers to the refrigerator within 2 hours.
If the temperature is above 90°F (32°C), refrigerate within 1 hour.
Can You Freeze Chocolate Cupcakes?
Plain, unfrosted chocolate cupcakes are usually a better choice for freezing than completed mousse-frosted cupcakes.
Cool them completely, wrap them securely, and place them in a freezer-safe container.
Use within 2 to 3 months for the best quality.
Thaw in the refrigerator or according to your normal safe defrosting method before decorating.
Can You Freeze the Mousse Frosting?
Freezing may affect the frosting’s smooth texture and airiness.
After thawing, it may become grainy or release moisture.
For an important event, make a fresh batch rather than relying on frozen frosting.
Should You Reheat Frosted Cupcakes?
No.
Heating a mousse-frosted cupcake will soften or melt the topping.
If you prefer warm chocolate cake, heat an unfrosted cupcake separately and add a suitable topping afterward.
Frequently Asked Questions About Chocolate Cupcakes with Chocolate Mousse Frosting
1. How do you make chocolate cupcakes with chocolate mousse frosting?
Prepare a chocolate cupcake batter using flour, cocoa, butter, sugar, eggs, milk, and leavening ingredients. Bake and cool the cupcakes. For the frosting, whip cold cream with powdered sugar, then gently fold in melted chocolate that has cooled but remains fluid.
2. Is chocolate mousse frosting the same as buttercream?
No. Buttercream usually relies on butter and powdered sugar for its texture. Chocolate mousse-style frosting uses whipped cream and chocolate, making it softer and more delicate.
3. Can I make chocolate cupcakes with chocolate mousse frosting ahead of time?
Yes. Bake the cupcakes in advance and store them appropriately. Prepare and apply the whipped cream frosting closer to serving for the freshest texture.
4. Why is my chocolate mousse frosting runny?
The chocolate may have been too warm, the cream may not have whipped properly, or the mixture may have been overworked. Chill it briefly to see whether it firms up. If the cream has fully collapsed, chilling alone may not restore its original texture.
5. Can I use dark chocolate for the frosting?
Yes, but dark chocolate has a stronger flavor and different composition. The frosting may set more firmly, so the exact result depends on the chocolate you choose.
6. Can I use milk chocolate instead?
Milk chocolate produces a sweeter flavor. It may also change the firmness of the frosting, so treat it as a variation that should be tested.
7. Do chocolate mousse-frosted cupcakes need refrigeration?
Yes. The frosting contains whipped cream and is perishable. Store the finished cupcakes in the refrigerator and keep them cold until serving.
8. How long do these chocolate cupcakes last?
For the best quality, eat frosted cupcakes within 2 to 3 days when stored correctly in the refrigerator. Unfrosted cupcakes can be frozen for longer storage.
9. Can I decorate the cupcakes with chocolate shavings?
Yes. Chocolate shavings add a lovely finishing touch without changing the cake or frosting recipe. Sprinkle them on shortly before serving.
10. Can I make mini chocolate cupcakes with mousse frosting?
Yes, although the baking time and yield will change. Use a mini muffin pan, check the cupcakes earlier, and frost only after they have cooled completely.
Wrapping Up
These chocolate cupcakes with chocolate mousse frosting combine two things chocolate lovers appreciate: a rich cocoa cupcake and a smooth, airy chocolate topping.
The recipe is made with familiar baking ingredients, and the decoration can be as simple as a small swirl of frosting and a few chocolate curls.
Just pay close attention to the chocolate temperature when making the mousse-style topping. That step is what helps the chocolate combine with the whipped cream without losing its delicate texture.
Serve the cupcakes chilled for a birthday, family get-together, or weekend dessert.
If you give this recipe a try, leave a comment and share how your cupcakes turned out. Did you keep the frosting simple or add chocolate shavings on top?
More Recipes You’ll Love
If these chocolate cupcakes with chocolate mousse frosting sound like your kind of dessert, here are a few more recipes to explore on Recipe Minty.
Pioneer Woman Inspired Chocolate Sheet Cake
For another chocolate-rich dessert, try this sheet cake with its smooth chocolate frosting. It’s a practical choice when you want to serve a larger group.
Healthy Edible Cookie Dough Recipe
Looking for a different chocolate-chip treat? This edible cookie dough recipe offers a soft, scoopable dessert with plenty of sweet flavor.
No-Bake Blueberry Cheesecake Bars
For something cooler and fruitier, these creamy cheesecake bars combine a buttery crumb base with a bright blueberry topping.
These crunchy no-bake cookies bring together sweet and salty textures for an easy dessert-table option.