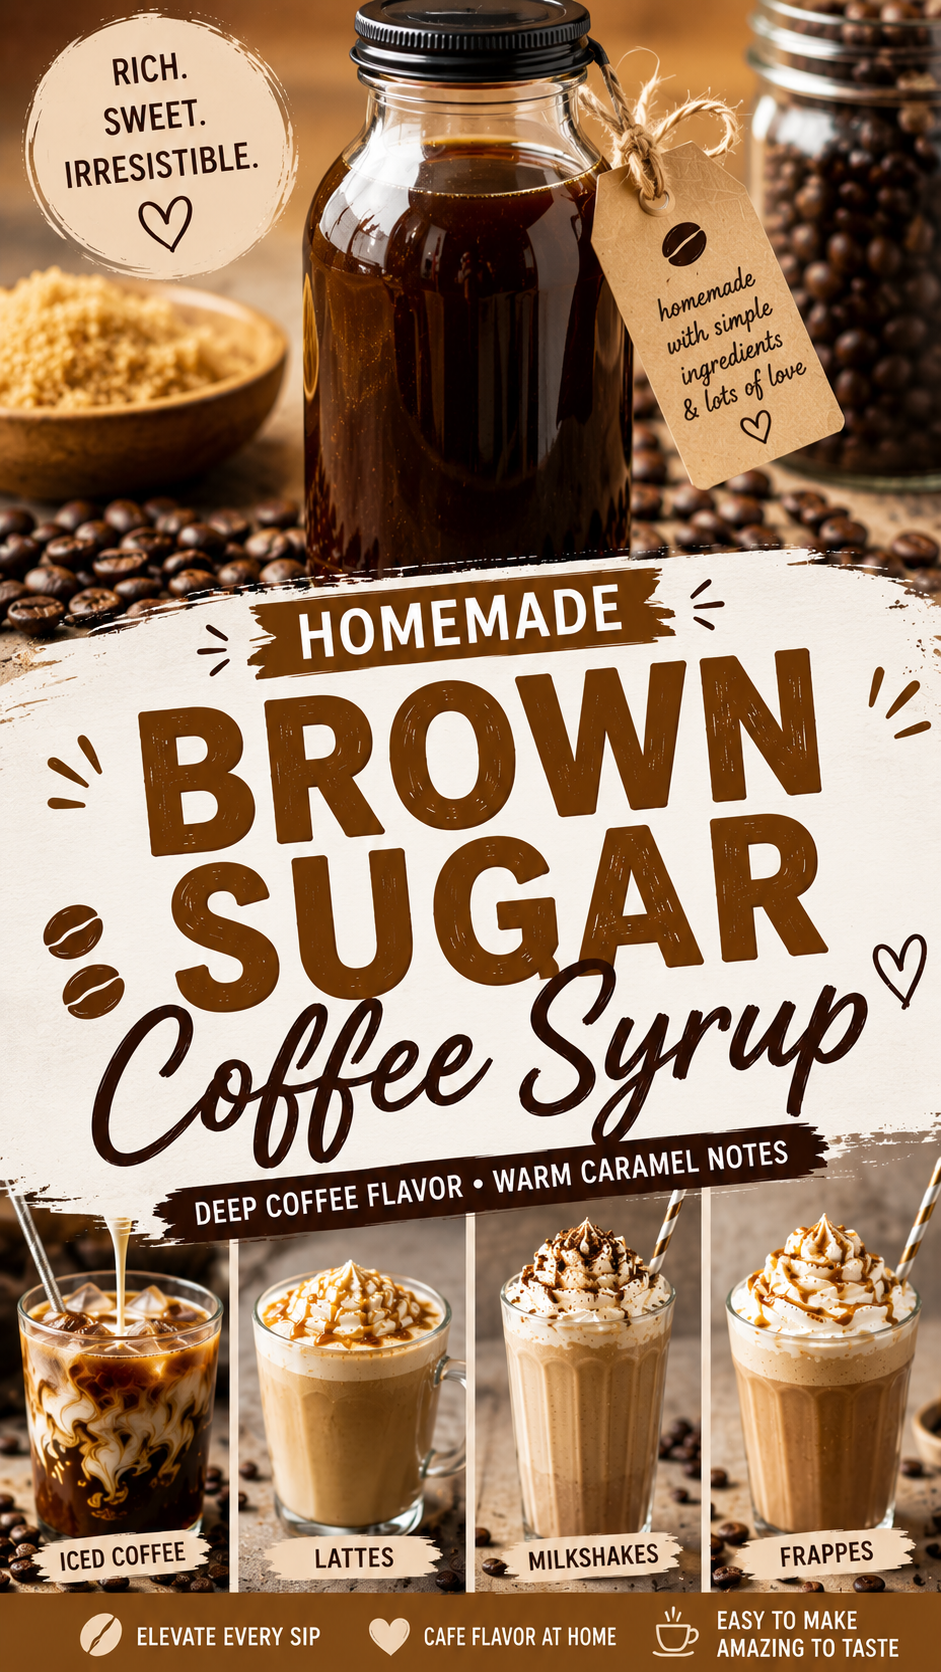
If you’ve ever ordered a brown sugar oat milk shaken espresso and thought “I need this in my house every single morning” — this recipe is for you.
The caramel-like depth that brown sugar brings to coffee syrup is on a completely different level from regular white sugar syrup. It’s warmer, richer, and has this almost toffee-like quality that turns a basic iced coffee into something you’d genuinely pay $7 for.
And you can make a whole jar of it for under $2.
Here’s everything you need to know.
What You’ll Need
Ingredients
- 1 cup packed dark brown sugar (light brown works too, but dark gives more depth)
- 1 cup water
- 1 teaspoon pure vanilla extract
- 1/2 teaspoon ground cinnamon
- Pinch of fine sea salt
Makes: About 1.5 cups of syrup Prep Time: 3 minutes | Cook Time: 12 minutes | Total: 15 minutes
Tools Required
- Small saucepan
- Wooden spoon or silicone spatula
- Measuring cups and spoons
- Fine mesh strainer
- 16 oz glass mason jar or airtight bottle for storage
How to Make It (Step-by-Step)
Step 1: Combine water, brown sugar, and cinnamon.
Add the water, packed brown sugar, and ground cinnamon to your saucepan over medium heat.
Step 2: Stir until fully dissolved.
Stir continuously for 3-4 minutes. Brown sugar takes a little longer to dissolve than white, so give it the time it needs. Once the liquid is smooth with no graininess on the spatula, you’re ready for the next step.
Step 3: Simmer gently.
Reduce to medium-low and let it simmer for 8-10 minutes, stirring every couple of minutes. It should reduce slightly and thicken just a little. You’ll start to smell that caramel-like sweetness coming through — that’s a good sign.
Step 4: Remove from heat and add vanilla and salt.
Once off the burner, stir in the vanilla extract and pinch of salt. Both go in off the heat so neither flavor cooks away.
Step 5: Cool and bottle.
Let it sit on the counter for 20-30 minutes before transferring to your jar. It thickens more as it cools. Seal tightly and refrigerate.
Pro Tips
What actually makes a difference here:
- Dark brown sugar over light. The difference in flavor is real. Dark brown sugar has more molasses, which is where that deep, caramel-toffee flavor comes from. It’s worth grabbing if your store carries it.
- Pack the sugar when measuring. Brown sugar should be packed firmly into the measuring cup. Loose brown sugar means you’re using less than the recipe calls for, and your syrup will be too thin and mild.
- Don’t let it boil hard. A rolling boil burns the sugar and gives you a bitter, slightly acrid flavor. Keep it at a gentle simmer — you want lazy little bubbles, not a full boil.
- Add a cinnamon stick instead of ground cinnamon if you want a more subtle, clean spice flavor. Just drop it in while simmering and pull it out when straining. Ground cinnamon gives more punch, so it comes down to preference.
- Make it the night before. The flavor genuinely deepens after sitting in the fridge overnight. Next-morning you will thank you.
Substitutions and Variations
No dark brown sugar? Light brown sugar still works — the syrup will just be slightly less intense. You can also stir in 1 teaspoon of molasses to deepen the flavor if you only have light brown sugar on hand.
Skip the cinnamon if you want a cleaner, more neutral coffee syrup that lets the brown sugar speak for itself.
Add a pinch of cardamom along with the cinnamon for a subtle spiced latte vibe. A little goes a long way here — 1/8 teaspoon is plenty.
Maple brown sugar version: Replace 2 tablespoons of water with pure maple syrup. It adds a layer of flavor that pairs incredibly well with fall coffee drinks.
Brown sugar mocha: Add 2 tablespoons of unsweetened cocoa powder to the pan with the sugar and water. Whisk well before heating. The result is a rich, chocolatey-caramel syrup that’s perfect for mochas and frappes.
Vegan? This recipe is completely vegan as written.
Make Ahead Tips
This is a great one to batch on Sunday for the whole week.
A double batch (2 cups sugar + 2 cups water) fills a full 32 oz jar and keeps you covered for two weeks of daily use.
The syrup stores in the fridge for 3-4 weeks in a sealed glass jar.
For longer storage, freeze in an ice cube tray, then transfer the cubes to a freezer bag. They keep for up to 3 months and melt perfectly into hot or iced coffee.
Nutritional Breakdown
(Per 1 tablespoon serving)
| Nutrient | Amount |
|---|---|
| Calories | 52 kcal |
| Total Carbohydrates | 13g |
| Sugars | 13g |
| Fat | 0g |
| Protein | 0g |
| Sodium | 7mg |
| Iron | 0.2mg |
Dietary notes:
- Gluten-free ✓
- Vegan ✓
- Dairy-free ✓
- Lower sugar option: Substitute with coconut sugar in a 1:1 ratio for a slightly less sweet syrup with a similar caramel note
- Brown sugar contains small amounts of iron and calcium compared to refined white sugar — not enough to be a health food, but a minor bonus
Drink and Meal Pairing Suggestions
Where this syrup does its best work:
- Iced coffee or cold brew — 1-2 tablespoons per glass, stir well before drinking
- Brown sugar oat milk latte — the reason most people make this syrup in the first place
- Shaken espresso — shake 2 shots of espresso with 1-2 tablespoons of syrup and ice, then pour over oat milk
- Hot lattes — stir into the espresso before adding steamed milk
- Overnight oats — a tablespoon instead of maple syrup gives a cozy, caramel flavor
- Pancakes or French toast — drizzle directly as a topping
- Vanilla ice cream — warm it slightly and pour it over like a caramel sauce
- Frappes and milkshakes — blend with ice, milk, and espresso or cold brew
- Cocktails — excellent in a brown sugar bourbon sour or a coffee old fashioned
Leftovers and Storage
Fridge: 3-4 weeks in a sealed glass jar. Shake or stir before each use.
Freezer: Up to 3 months in ice cube trays. Each standard cube is about 2 tablespoons.
If it crystallizes: This happens more with brown sugar syrups than white sugar ones because of the molasses content. If you notice sugar crystals forming, just reheat it gently in the saucepan with a splash of water and stir until smooth again.
Storage tip: Glass jar over plastic — every time. Plastic absorbs the dark color and smell over time, and nobody wants their storage containers to permanently smell like coffee.
FAQ
What’s the difference between this and regular coffee syrup?
Regular coffee syrup is made with brewed coffee and white sugar. This one is a sweet syrup you add to coffee — made with brown sugar, water, vanilla, and cinnamon. It sweetens and flavors the drink rather than adding extra coffee concentration.
Can I use coconut sugar instead of brown sugar?
Yes — coconut sugar has a similar caramel note and works well in a 1:1 swap. The syrup will be slightly less sweet and have a more earthy flavor.
Why is my syrup grainy after cooling?
The sugar likely didn’t fully dissolve before you moved to the simmer stage. Return it to the pan with a small splash of water, heat over low, and stir until completely smooth before cooling again.
How much should I add to my coffee?
Start with 1 tablespoon per 8-10 oz drink. Adjust from there based on how sweet you like it. Most people land somewhere between 1-2 tablespoons.
Can I make this without vanilla?
Yes — vanilla rounds out the flavor but the syrup still tastes great without it. If you skip it, consider adding a tiny extra pinch of cinnamon to compensate.
Is this the same as the Starbucks brown sugar syrup?
It’s very close. Starbucks uses brown sugar, cinnamon, and vanilla in their version. This recipe replicates those same core flavors — some people actually prefer this homemade version because it’s less sweet and has more pronounced cinnamon.
How long does it last unrefrigerated?
Don’t leave it out at room temperature for more than a few hours. Since there are no preservatives, it needs to be refrigerated to stay fresh.
Wrapping Up
Brown sugar coffee syrup is the kind of thing that sounds like a small kitchen project until you taste it in your first iced latte of the morning.
Then it becomes a permanent part of your routine.
It takes 15 minutes, costs almost nothing, and the little jar sitting in your fridge will quietly make your whole coffee situation better every single day.
Make a batch, try it in a shaken espresso over oat milk, and then come back and tell me what you thought. I also want to hear if you tried any of the variations — especially the maple version. Drop your questions or thoughts in the comments below. ☕