You know that dessert that makes everyone at the table stop mid-conversation? This is it.
No oven. No melting in the kitchen. Just cold, creamy, ridiculously good strawberry cheesecake in individual cups — ready in under 30 minutes and impressive enough to make people think you spent hours on them.
Spoiler: you didn’t. And you don’t have to tell them.
These no-bake strawberry cheesecake cups have a buttery graham cracker crust on the bottom, a thick and silky cream cheese filling, and a fresh strawberry topping that honestly just looks like summer. They’re individually portioned, which means zero messy slicing, and they hold up beautifully in the fridge for days.
If you’ve ever tried making a traditional cheesecake and ended up with cracks, a soggy crust, or a filling that just wouldn’t set — this recipe fixes all of that, because there’s no baking involved whatsoever.
Curious how something this simple can taste this good? Keep reading. 👇
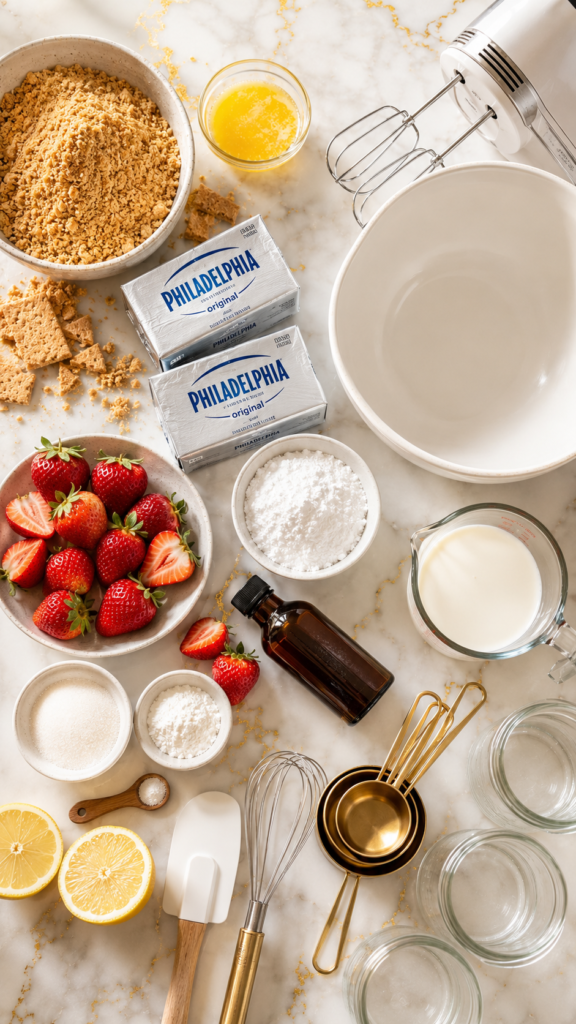
What You’ll Need
For the Crust
- 1 ½ cups graham cracker crumbs (about 10–12 full crackers)
- 6 tablespoons unsalted butter, melted
- 2 tablespoons granulated sugar
- ¼ teaspoon cinnamon (optional, but really good)
For the Cheesecake Filling
- 16 oz (2 blocks) full-fat cream cheese, softened to room temperature
- 1 cup powdered sugar, sifted
- 1 teaspoon pure vanilla extract
- 1 cup heavy whipping cream, cold
- 2 tablespoons fresh lemon juice
For the Strawberry Topping
- 2 cups fresh strawberries, hulled and diced
- 2 tablespoons granulated sugar
- 1 teaspoon fresh lemon juice
- 1 teaspoon cornstarch mixed with 1 tablespoon cold water (optional, for a thicker sauce)
Tools You’ll Need
- Large mixing bowl
- Hand mixer or stand mixer
- Medium saucepan (for the strawberry topping)
- Rubber spatula
- Measuring cups and spoons
- Whisk
- 8 individual serving cups, jars, or ramekins (8 oz size works great)
- Piping bag or zip-lock bag with a corner snipped (optional, for a cleaner fill)
- Spoon or small cookie scoop (for the crust layer)
- Plastic wrap (for chilling)
Pro Tips
These are things I’ve learned the hard way so you don’t have to:
- Your cream cheese must be fully softened. If it’s even slightly cold, you’ll end up with a lumpy filling no matter how long you mix it. Pull it out of the fridge at least an hour before you start. This is non-negotiable.
- Keep your heavy cream cold right up until you use it. Cold cream whips up faster and holds its shape way better. Some people even chill the bowl in the freezer for 10 minutes beforehand. That trick works.
- Don’t skip sifting the powdered sugar. Little sugar lumps in a creamy filling are not cute. Just sift it.
- Press the crust down firmly. Use the back of a spoon or the bottom of a small glass to really compact it. A loose crust crumbles the second you dig in, and nobody wants that.
- Let the cups chill for at least 2 hours before serving. The filling needs time to firm up. If you try to serve them right after assembling, they’ll be soft and not hold their shape when you scoop into them. Patience pays off here.
Substitutions and Variations
Crust swaps:
- Oreo cookies (with filling removed) instead of graham crackers = chocolate cheesecake cup
- Digestive biscuits for a slightly less sweet, more European vibe
- Gluten-free graham crackers to make it GF-friendly
Filling swaps:
- Swap heavy cream for coconut cream for a dairy-free version (use dairy-free cream cheese too)
- Use honey instead of powdered sugar for a more natural sweetener
- Add a tablespoon of strawberry jam into the filling itself for an extra punch of flavor
Topping variations:
- Blueberries or raspberries instead of strawberries
- Mango and lime for a tropical twist that’s honestly incredible in summer
- Nutella swirl on top instead of fruit (no complaints from anyone, ever)
Make-Ahead Tips
These cups are made for making ahead. Here’s how to plan it:
- Crust: Can be pressed into cups and stored (covered) in the fridge up to 2 days in advance.
- Filling: Make it, pipe it in, cover tightly with plastic wrap, and refrigerate up to 3 days before serving.
- Strawberry topping: Make this the day you serve. Fresh toppings taste brightest and look their best when they haven’t been sitting around.
If you’re making these for a party or gathering, assemble everything except the topping the night before. Add the strawberries right before people arrive.
How to Make No-Bake Strawberry Cheesecake Cups
Step 1: Make the Crust
In a bowl, mix together 1 ½ cups graham cracker crumbs, 6 tablespoons melted butter, 2 tablespoons sugar, and cinnamon if using.
Stir until everything looks like wet sand and holds together when pressed.
Divide the mixture evenly among 8 cups (about 2–3 tablespoons per cup). Press firmly with the back of a spoon. Pop the cups in the fridge while you make the filling.
Step 2: Make the Cheesecake Filling
In a large bowl, beat 16 oz softened cream cheese with a hand mixer on medium speed until completely smooth — about 2 minutes.
Add 1 cup sifted powdered sugar, 1 teaspoon vanilla, and 2 tablespoons lemon juice. Beat again until fully combined.
In a separate cold bowl, whip 1 cup heavy cream until stiff peaks form.
Gently fold the whipped cream into the cream cheese mixture using a rubber spatula. Don’t stir aggressively — fold it. You want it light and airy, not deflated.
Step 3: Fill the Cups
Spoon or pipe the cheesecake filling on top of each chilled crust. Fill them generously — these are dessert cups, not sample sizes.
Smooth the tops with the back of a spoon or an offset spatula if you want them to look Instagram-worthy.
Cover each cup with plastic wrap and refrigerate for a minimum of 2 hours (overnight is even better).
Step 4: Make the Strawberry Topping
In a medium saucepan over medium heat, combine 2 cups diced strawberries, 2 tablespoons sugar, and 1 teaspoon lemon juice.
Cook, stirring occasionally, for about 5–7 minutes until the strawberries break down and release their juices.
For a thicker sauce, stir in the cornstarch-water mixture and cook for another 1–2 minutes until it thickens up.
Remove from heat and let it cool completely before topping the cups. (Warm topping on cold cheesecake = sad melted filling.)
Step 5: Top and Serve
Right before serving, spoon the cooled strawberry topping over each cup. Add fresh sliced strawberries on top for extra visual flair if you want.
Serve immediately and watch them disappear.
Nutritional Info (Per Serving, Approximate)
| Nutrient | Amount |
|---|---|
| Calories | ~420 kcal |
| Total Fat | 30g |
| Saturated Fat | 18g |
| Carbohydrates | 35g |
| Sugar | 24g |
| Protein | 5g |
| Fiber | 1g |
For a lighter version: use reduced-fat cream cheese and replace half the heavy cream with Greek yogurt. You’ll lose a little richness but save about 100 calories per cup.
Dietary swaps at a glance:
| Diet | Swap |
|---|---|
| Gluten-free | GF graham crackers |
| Dairy-free | Dairy-free cream cheese + coconut cream |
| Lower sugar | Reduce powdered sugar to ½ cup + skip sugar in crust |
| Vegan | Dairy-free swaps above + maple syrup instead of honey |
Meal Pairing Suggestions
These cups are rich enough to stand on their own, but they pair really well with:
- A glass of sparkling rosé or a light prosecco
- Iced mint lemonade for a non-alcoholic pairing
- After a light summer dinner like grilled chicken or a big green salad (you want something that won’t compete with the richness)
Leftovers and Storage
- Refrigerator: Cover with plastic wrap or store in airtight containers. Good for up to 4 days. The crust will soften a little over time but the flavor is still great.
- Freezer: Yes, you can freeze these — but freeze them before adding the strawberry topping. Cover tightly and freeze for up to 1 month. Thaw overnight in the fridge, then add fresh toppings before serving.
- Topping: Store any extra strawberry sauce in a jar in the fridge for up to 5 days. It’s also great on pancakes, yogurt, or ice cream.
FAQ
Can I use frozen strawberries for the topping? Yes. Thaw them first and drain any extra liquid before cooking. The flavor is slightly less bright than fresh but totally works, especially off-season.
My filling came out lumpy. What happened? Almost always a cold cream cheese problem. Make sure yours is truly at room temperature before mixing. Even 30 minutes out of the fridge isn’t always enough — aim for a full hour.
Can I make one big cheesecake instead of individual cups? You can press the crust into a 9-inch springform pan, add the filling, chill, and serve it that way. You’ll need to chill it for at least 4–6 hours since it’s a bigger mass.
How do I know when the whipped cream has stiff peaks? Lift the beaters — if the cream holds a firm point and doesn’t droop, you’re there. Stop immediately after that. Over-whipped cream gets grainy.
Can I add gelatin to make the filling firmer? You don’t need to for cups — the filling sets up nicely on its own with enough chill time. If you’re making a larger cheesecake, you could add 1 teaspoon of gelatin bloomed in 2 tablespoons of cold water, but for individual cups, skip it.
Can I use Cool Whip instead of homemade whipped cream? You can. Use 1 ½ cups of Cool Whip and fold it straight into the cream cheese mixture. The flavor won’t be as rich, but it’s a totally valid shortcut.
Do these need to be refrigerated at events? Yes. Keep them cold. They’re fine out for about 1–2 hours at room temperature, but after that the filling starts to soften too much.
Wrapping Up
These no-bake strawberry cheesecake cups are one of those recipes that feel like a little more effort than they actually are — and that’s a good thing.
They’re creamy, fresh, and genuinely fun to eat. They’re the kind of dessert that gets people asking for the recipe before they’ve even finished it.
Now go make them. You’ve got everything you need.
And when you do — drop a comment below. Tell me how they turned out, what you changed, which topping variation you tried. I read every single one. 🍓