I didn’t grow up canning anything. No water bath, no sterilizing jars, none of that.
So when I first heard about refrigerator pickles, I figured there had to be a catch.
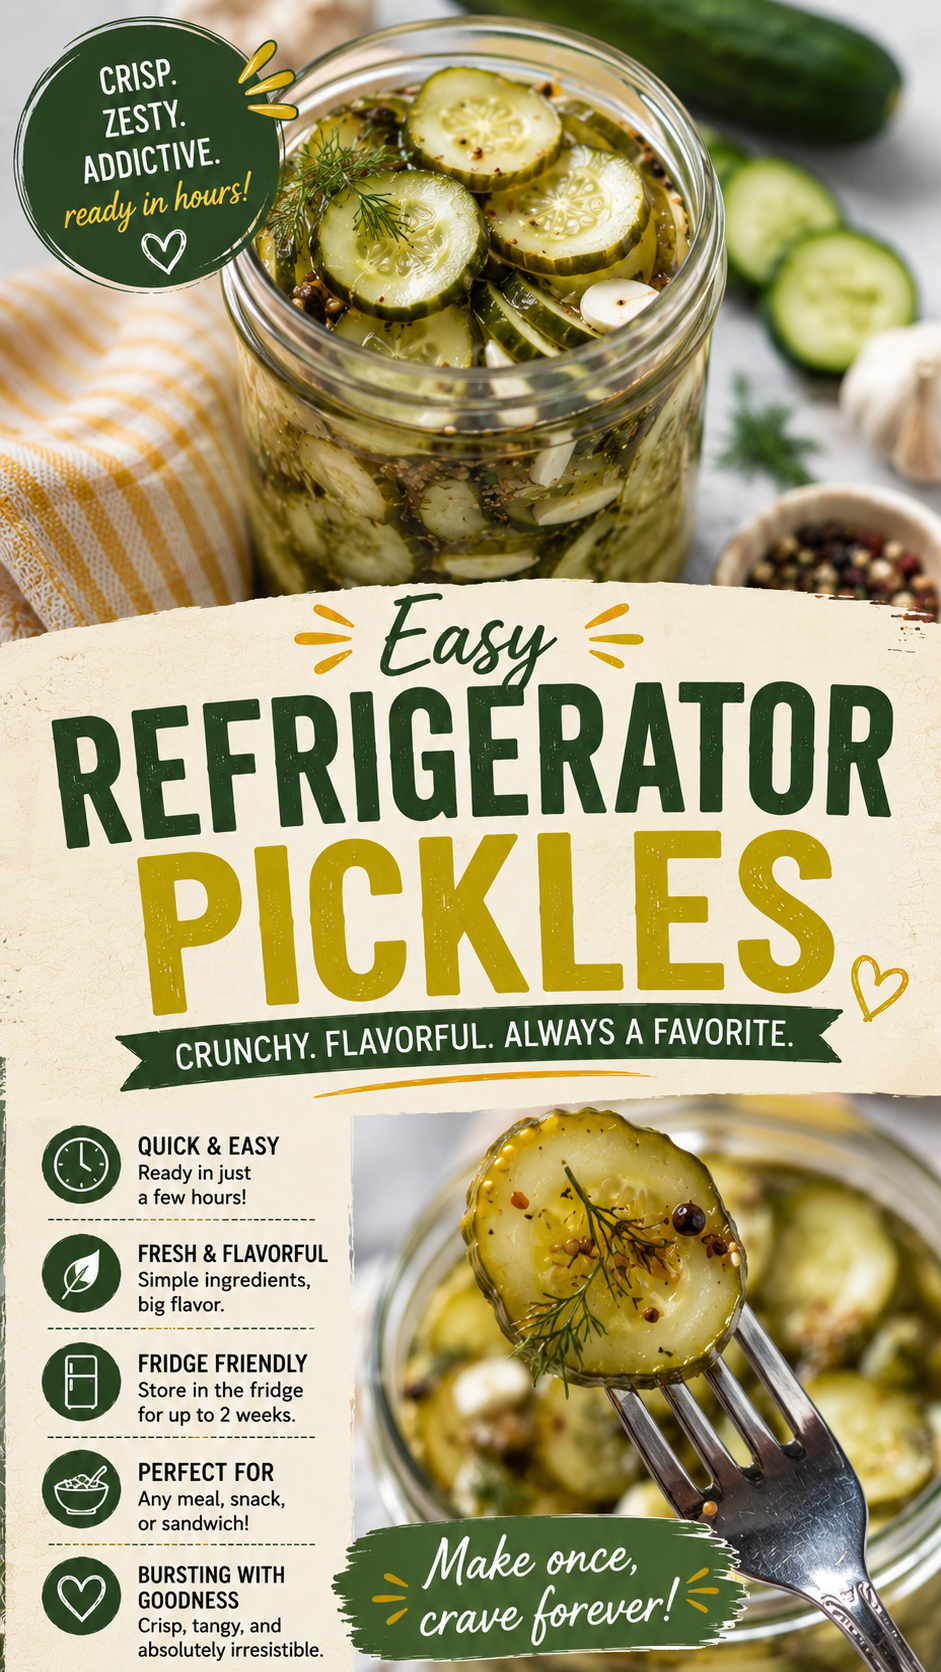
There wasn’t. You slice some cucumbers, mix a simple brine, pour it over, and stick the jar in the fridge. That’s basically it. 🥒
A few hours later, you’ve got crisp, garlicky, slightly tangy pickles that taste better than half the jars at the store.
No canning equipment. No special skills. Just a jar and some patience.
Why This Recipe Works
Traditional pickling involves heat processing and sealing jars so they’re shelf-stable for months.
Refrigerator pickles skip all of that. The vinegar brine still does the work of preserving and flavoring the cucumbers, it just relies on the fridge instead of a sealed jar to keep things safe.
That means less time, less equipment, and honestly, a fresher tasting pickle.
The cucumbers stay crunchy because they’re never cooked. The brine seeps in over time, but the cucumber itself stays raw and crisp the whole way through.
It’s the kind of recipe where the simplicity is the whole point.
Here’s something that surprised me when I first read into it: pickling cucumbers has been around for thousands of years, long before refrigerators even existed. People used to rely purely on salt and vinegar to keep food edible through the winter. 🧄
Refrigerator pickles are basically the modern, lazy version of that ancient trick, and honestly, I’m grateful for it.
What You’ll Need
- 4-5 medium cucumbers (Persian or pickling cucumbers work best), sliced into rounds
- 1 cup white vinegar
- 1 cup water
- 2 tbsp granulated sugar
- 1 tbsp kosher salt
- 4 garlic cloves, sliced
- 1 tbsp whole black peppercorns
- 1 tsp mustard seeds
- ½ tsp red pepper flakes
- A few sprigs of fresh dill
That’s the full list. Nothing exotic, nothing you need to special-order.
Tools You’ll Need
- A large mason jar or two smaller ones (32 oz works well)
- A small saucepan
- A knife and cutting board
- A mandoline slicer (optional, but it makes even slices faster)
How to Make Refrigerator Pickles
Step 1: Slice the cucumbers
Wash the cucumbers and slice them into rounds, about ¼ inch thick.
If you want spears instead of rounds, slice them lengthwise into quarters. Either works.
Try to keep the slices a consistent thickness. It helps the brine soak in evenly across every piece.
Step 2: Make the brine
Combine the vinegar, water, sugar, and salt in a small saucepan.
Heat over medium until the sugar and salt fully dissolve, about 2-3 minutes. You’re not trying to boil it, just warm it enough to dissolve everything.
Let the brine cool slightly while you prep the jar. Pouring it on while it’s too hot can soften the cucumbers more than you want.
Step 3: Layer the jar
Add the garlic, peppercorns, mustard seeds, red pepper flakes, and dill into the jar first.
Then pack the cucumber slices in tightly on top.
Packing them in snugly matters more than people expect. Loose cucumbers float around and end up unevenly pickled.
Step 4: Pour and seal
Pour the warm brine over the cucumbers, making sure they’re fully submerged.
If you’re short on brine, top it off with a splash of water and vinegar in equal parts.
Seal the jar with its lid and give it a gentle shake to settle everything.
Step 5: Chill
Refrigerate for at least 4 hours, though overnight gets you a better flavor.
The longer they sit, the more the flavor develops. Day two and three are honestly when they taste their best.
If you can resist eating them right away, you’ll be rewarded for the wait.
Pro Tips
These are the small details that make a real difference, especially the first time you make these.
- Use pickling or Persian cucumbers, not regular slicing cucumbers. Regular cucumbers have more water content and turn mushy faster.
- Don’t skip drying the cucumbers after washing. Excess water dilutes the brine and waters down the flavor.
- Pack the jar tightly. The more snugly the cucumbers fit, the more evenly the brine coats every slice.
- Use a glass jar, not plastic. Plastic can absorb the vinegar smell and hang onto it long after the pickles are gone.
- Taste-test on day two. A lot of people try them too early on day one and think the flavor’s weak. Give it time.
- Don’t overfill the jar with brine before adding the lid. Leave a small gap at the top so you can give it a gentle shake without spilling.
Substitutions and Variations
- Want it spicier? Add a sliced jalapeño or double the red pepper flakes.
- No fresh dill? Use 1 tsp dried dill instead, it’s slightly less fragrant but still works.
- Want a sweeter pickle? Add an extra tablespoon of sugar to the brine.
- Different vegetables? This brine works great on carrots, red onions, or green beans too.
- Apple cider vinegar swap. Use it in place of white vinegar for a slightly fruitier, milder tang.
- Want a smokier flavor? Add a small pinch of smoked paprika to the brine before heating.
- Bread and butter style? Skip the red pepper flakes and double the sugar for a sweeter, classic sandwich pickle.
Make Ahead Tips
This whole recipe is basically a make-ahead recipe by design.
Make the brine a day or two in advance if you want, and just store it in the fridge until you’re ready to pour it over fresh-cut cucumbers.
I usually make a batch on Sunday so they’re ready to snack on by Tuesday.
Nutritional Info & Diet Swaps
One serving (about ½ cup) comes out to roughly 25 calories, with almost no fat and very little sugar once you account for how much brine actually clings to the cucumbers.
For a lower sodium version: Cut the salt down to 2 teaspoons. It changes the flavor slightly, but it’s still good.
For keto or low sugar diets: Swap the granulated sugar for a sugar substitute like monk fruit or erythritol, both dissolve well in warm brine.
These pickles are naturally gluten-free and vegan as written, no swaps needed there.
Meal Pairing Suggestions
These pickles are one of those things that make almost anything taste better.
I keep a jar in my fridge at all times for this reason alone.
- Burgers and sandwiches: A few slices on top adds crunch and cuts through richness.
- Charcuterie boards: They add acidity that balances out cheese and cured meats.
- Tacos: Diced pickle adds a surprising, tangy crunch on top of pulled pork or fish tacos.
- Bloody Marys: A spear makes a great garnish, and honestly, a great snack while you wait for brunch.
Time-Saving Tips
- Use a mandoline for slicing, it cuts prep time in half and keeps every slice even.
- Make a double batch of brine while you’re at it, since it stores well and saves you from repeating the process next week.
- Skip peeling. Cucumber skin is totally fine to eat and adds extra crunch.
Leftovers and Storage
Store the jar in the fridge, sealed, for up to 2 weeks.
The flavor actually gets better over the first several days, so don’t worry if they taste a little mild on day one.
I don’t recommend freezing these. Cucumbers lose their crunch completely once frozen and thawed.
FAQ
Do I need to boil the jars first? No. Since these aren’t shelf-stable canned pickles, you don’t need to sterilize anything. A clean jar is enough.
How long do refrigerator pickles last? Up to 2 weeks in the fridge, though they’re usually gone well before that.
Can I reuse the brine for a second batch of cucumbers? You can, but the flavor will be noticeably weaker the second time around. I’d make fresh brine if you want a strong, punchy flavor.
Why are my pickles soft instead of crunchy? This usually means the cucumbers were too watery to start, or they sat out too long before going in the brine. Pickling cucumbers and quick refrigeration both help.
Can I can these instead, to make them shelf-stable? This particular recipe is meant for the fridge, not shelf storage. If you want a shelf-stable version, you’d need a proper water bath canning process with adjusted ratios.
Is the cloudy brine normal? A little cloudiness from the spices and garlic is completely normal. If it smells off or looks slimy, that’s a sign to toss the batch, but slight cloudiness on its own is fine.
Wrapping Up
This is the recipe I make when I want something that feels impressive but takes almost no effort.
A jar, a simple brine, and a little patience while they sit in the fridge. That’s really the whole process.
Make a batch this week and keep it in your fridge for snacking, sandwiches, or whatever needs a little extra crunch.
If you try this one, leave a comment below and let me know how it turned out, or share any flavor twists you tried. I’d love to hear about it.