I made a batch of these on a Tuesday afternoon and they didn’t even make it to Wednesday.
That’s honestly the best endorsement I can give them.
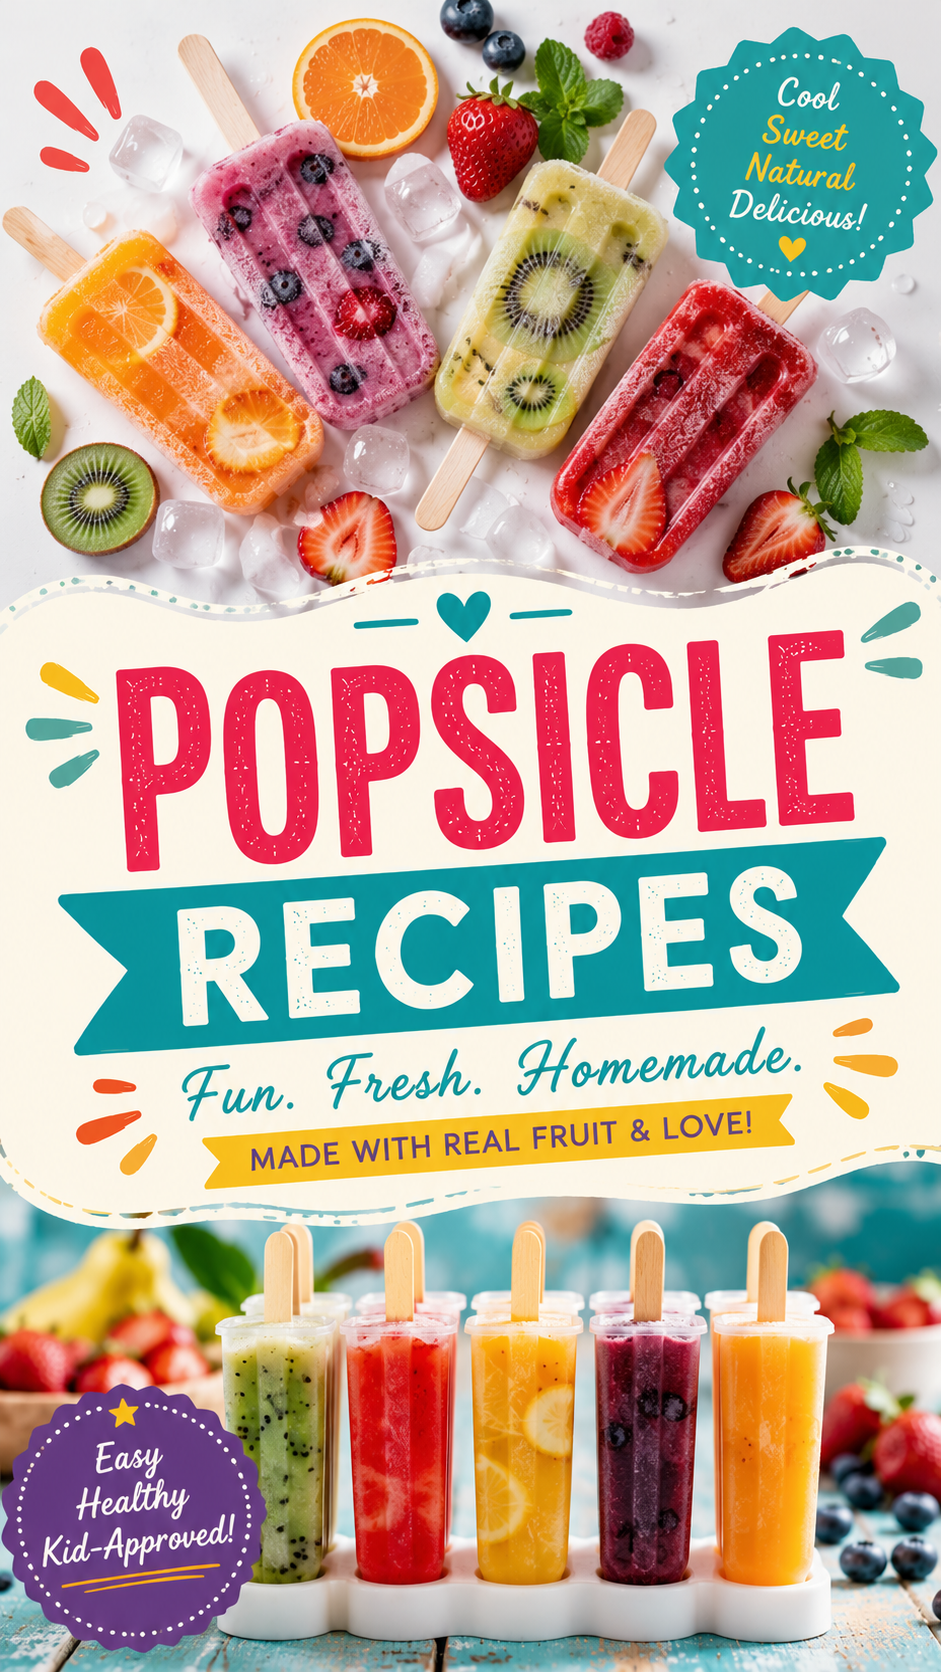
These homemade fruit popsicles are made with real fruit, a handful of pantry staples, and zero complicated steps. No candy-coated sugar bombs, no artificial dyes. Just fresh, bright flavor packed into a popsicle mold.
And here’s the thing that still gets me: they’re incredibly versatile. You can make them with whatever fruit is looking good at the market that week.
Keep reading, because I’ll also share a few combinations I think are absolutely worth trying. 🍊
What You’ll Need
For the base popsicles (makes 8 to 10):
- 3 cups fresh fruit, chopped (strawberries, mango, kiwi, blueberries, or a mix)
- 3 tablespoons honey or maple syrup (adjust to the sweetness of your fruit)
- 2 tablespoons fresh lemon or lime juice
- ¼ cup water or 100% fruit juice (orange juice works beautifully)
- Pinch of fine sea salt
Optional mix-ins:
- Whole blueberries or raspberry halves (pressed into the molds for a pretty look)
- Thin kiwi or orange rounds (layered against the sides of the mold)
- Fresh mint leaves
Tools You’ll Need
- Popsicle mold (silicone, 8 to 10 cavities)
- Wooden popsicle sticks
- Blender or food processor
- Fine mesh strainer (optional, for smoother texture)
- Small ladle or liquid measuring cup for pouring
- Toothpick or skewer (for removing air bubbles)
- Cutting board and sharp knife
Pro Tips
These are the things that genuinely change the outcome.
- Taste your fruit before blending. Fruit sweetness varies wildly depending on the season. A bland strawberry in January needs more honey than a peak-summer one. Taste first, then adjust.
- Lay the mold flat when filling it. Sounds obvious, but pouring into a tilted mold makes an uneven popsicle. Set it flat on a tray before filling so everything sits level.
- Tap the mold on the counter a few times after filling. This knocks out air bubbles and gives you a smoother, prettier result once frozen.
- Cover with plastic wrap before inserting the sticks. Poke the sticks through the wrap to hold them perfectly upright while freezing. Game changer.
- Use warm (not hot) water to unmold. Run the outside of the mold under warm tap water for about 10 to 15 seconds. Hot water melts the edges; warm water releases them cleanly.
How to Make Them
Step 1: Prep your fruit
Wash, peel, and chop everything into rough chunks. No need to be precise here; it’s all going into the blender.
Step 2: Blend
Add the fruit, honey, lemon juice, water (or juice), and sea salt to a blender. Blend until completely smooth, about 45 to 60 seconds.
Taste it. It should be a little more intense than you think you want, because flavors dull slightly when frozen.
Step 3: Strain (optional)
For a super smooth pop without seeds or pulp, pour the mixture through a fine mesh strainer into a pitcher or bowl. Use the back of a spoon to press it through.
Skip this step if you want more texture.
Step 4: Add any decorative fruit
Drop a few whole blueberries, a raspberry half, or a thin fruit slice into the bottom of each mold cavity. These show up beautifully once the popsicle is unmolded.
Step 5: Fill the molds
Pour the blended mixture into the molds, leaving about ¼ inch of space at the top (the liquid expands as it freezes).
Tap the mold on the counter a couple of times to release air bubbles.
Step 6: Freeze
Cover with plastic wrap, insert the sticks, and freeze for at least 5 to 6 hours. Overnight is better.
Step 7: Unmold
Run warm water over the outside of the mold for 10 to 15 seconds, then gently twist and pull each popsicle out.
Eat right away, or move to storage.
Flavor Combinations Worth Trying
This is honestly where the fun is. Each combo below has a slightly different character.
| Flavor | Fruit | Liquid | Add-Ins |
|---|---|---|---|
| Tropical | Mango + pineapple | Coconut water | Lime zest |
| Berry Blast | Strawberry + blueberry | Orange juice | Whole raspberries |
| Citrus Fresh | Orange + mango | Fresh OJ | Mint leaves |
| Green Kiwi | Kiwi + green apple | Apple juice | Thin kiwi rounds |
| Summer Peach | Peach + raspberry | White grape juice | Basil leaves |
Substitutions and Variations
No fresh fruit? Frozen fruit works just as well. No need to thaw it first; just blend straight from frozen and add a splash more liquid to help it blend smoothly.
Need it lower sugar? Skip the honey entirely and use naturally sweet fruit like ripe mango or banana as the base. You probably won’t even miss it.
Dairy-free already? Good news: this recipe is naturally dairy-free as written.
Want a creamy version? Blend in ½ cup of full-fat coconut milk or plain Greek yogurt. It gives the popsicle a creamier, almost ice cream-like texture. I personally love this with mango.
For kids: Skip the lemon juice entirely and use white grape juice as the liquid. Milder, sweeter, and they’ll finish them in about 30 seconds.
Make Ahead Tips
These are actually one of the better things you can make ahead for summer.
- Up to 2 weeks ahead: Make a full double batch, freeze solid, then wrap each popsicle individually in plastic wrap. Store in a zip-lock freezer bag labeled with the date.
- The fruit puree only: You can blend everything and store the puree in a sealed jar in the fridge for up to 3 days before pouring into molds. Just give it a stir before using since natural separation will happen.
Nutritional Breakdown (Per Popsicle)
These numbers are approximate and based on an 8-popsicle batch using strawberries, mango, and orange juice with 2 tablespoons of honey total.
| Nutrient | Per Popsicle |
|---|---|
| Calories | ~75 kcal |
| Carbohydrates | ~18g |
| Natural Sugars | ~14g |
| Protein | ~0.5g |
| Fat | ~0g |
| Fiber | ~1.5g |
| Vitamin C | ~25% DV |
Basically a piece of fruit on a stick. Not a bad deal.
Meal Pairing Ideas
These work great as:
- An after-school snack that doesn’t come out of a wrapper
- A light dessert after grilled fish or chicken tacos
- A palate cleanser between courses at a summer dinner party (very fancy, very easy)
- A “healthy treat” that you eat at 10pm while watching TV and feel zero guilt about
Leftovers and Storage
Once fully frozen:
- In the mold: Good for up to 1 week, though the texture is best in the first few days.
- Individually wrapped: Wrap each one in plastic wrap or parchment, then place in a freezer bag. Good for up to 2 weeks.
- Avoid: Leaving them exposed in the freezer without wrapping. They pick up freezer smells quickly, and nobody wants a salmon-flavored popsicle.
If you notice a bit of frost or ice crystals on the surface, they’ve just been in the freezer a little longer. They’re still perfectly fine to eat.
FAQ
Can I use frozen fruit instead of fresh?
Yes. Frozen fruit is actually ideal for this because it’s picked at peak ripeness and frozen immediately. Use it straight from the bag without thawing.
My popsicles have a lot of ice crystals in them. Why?
This usually happens when there’s too much water content in the mixture and not enough natural sugars or fat to interfere with freezing. Try adding a spoonful of honey or a splash of juice instead of plain water, and make sure you’re using ripe, sweet fruit.
Do I have to use a popsicle mold?
Not at all. Small paper cups or Dixie cups work just as well. Fill them, cover with foil, poke a stick through the foil to keep it standing straight, and freeze. Peel the cup away when you’re ready to eat.
How long do they need to freeze?
At least 5 to 6 hours, but overnight is the safer bet. If the center is still soft when you try to unmold them, pop them back in for another hour or two.
Can I mix multiple fruits together?
Yes, and honestly some of the best combinations come from mixing. Strawberry + mango, kiwi + lime, peach + raspberry. Just keep the total fruit amount to around 3 cups and blend everything together.
My popsicle is stuck in the mold. Help.
Run the outside of the mold under warm (not hot) running water for 10 to 20 seconds. Then give the stick a gentle twist while pulling upward. It should release cleanly. If not, give it another 10 seconds under the water.
Wrapping Up
These popsicles are the kind of recipe you make once and then repeat all summer on autopilot.
They’re cheap, fast, and made with actual food. And once you find your favorite flavor combination, you’ll probably always have a batch in the freezer.
Give them a try this week and let me know how they turned out in the comments below. I especially want to know what flavor combo you went with, and if you discovered something I haven’t tried yet. 👇