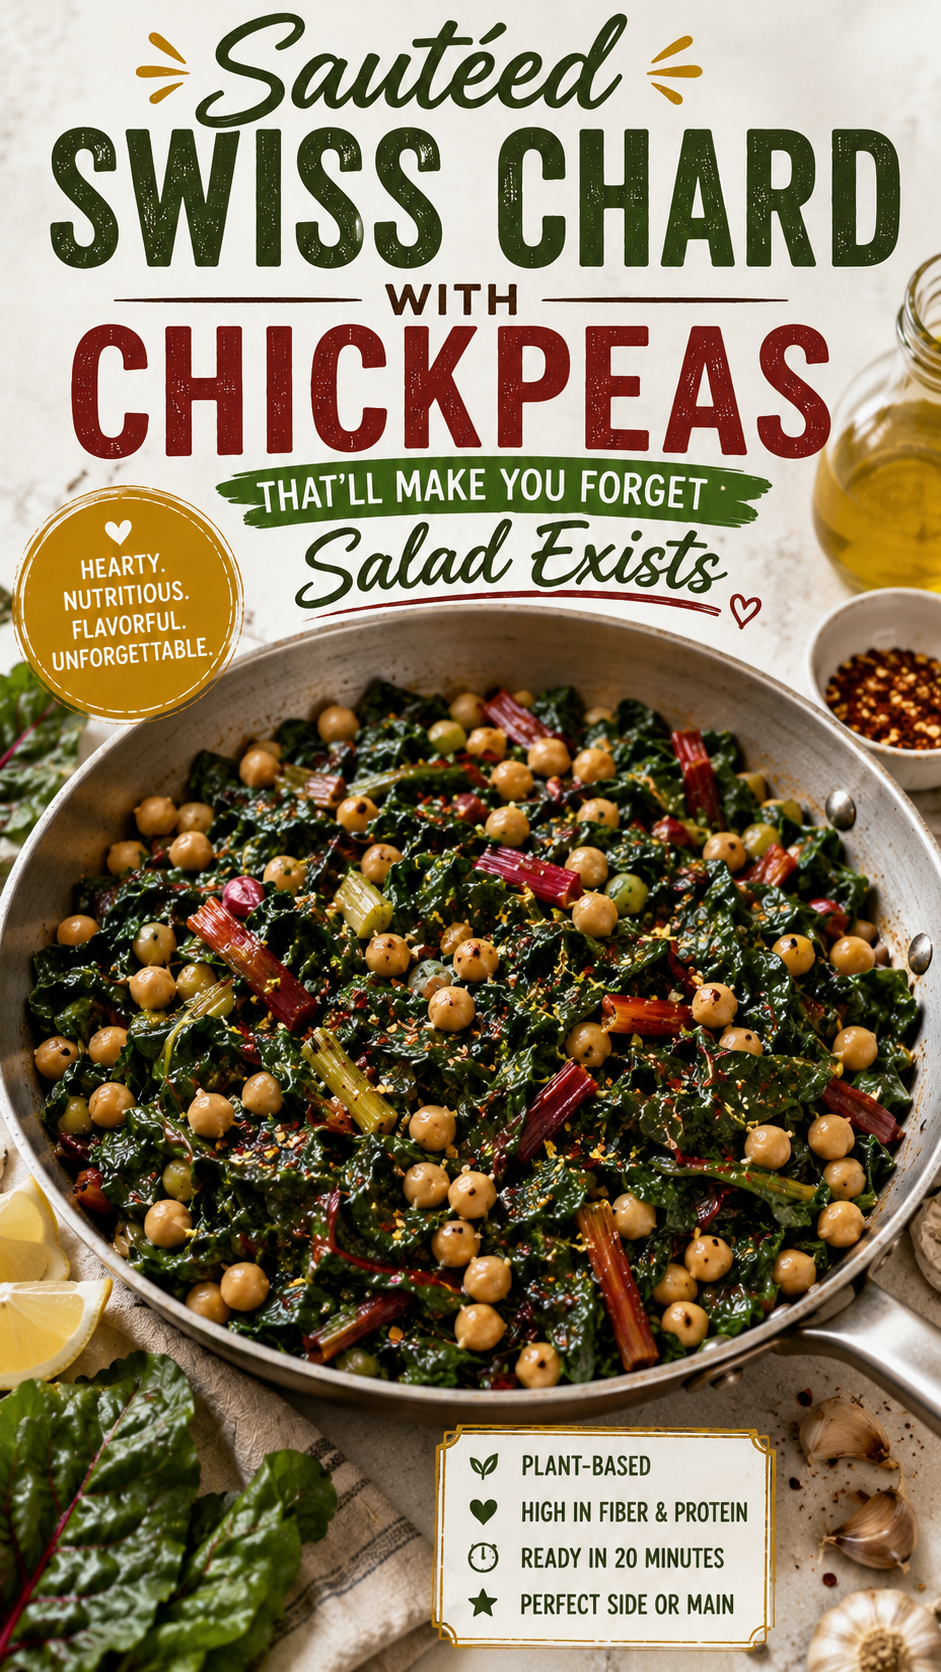
You know that leafy green sitting in the produce section that you’ve walked past about 47 times? Yeah, Swiss chard. It’s been there, waiting. And once you finally make this dish, you’ll wonder why it took you so long.
This sautéed Swiss chard with chickpeas is garlicky, lemony, and comes together in under 20 minutes. It’s the kind of recipe that looks impressive but requires almost zero effort. Weeknight dinner, fancy dinner party side, lazy Sunday lunch — it works for all of it.
And here’s the part nobody tells you: Swiss chard is actually way more forgiving and flavorful than spinach. The stems stay a little crispy, the leaves wilt perfectly, and it soaks up garlic-infused olive oil like it was born for it.
Keep reading, because the Pro Tips section alone might change how you cook greens forever.
What You’ll Need
For the Dish
- 1 large bunch of Swiss chard (about 10–12 large leaves, roughly 400g)
- 1 can (400g / 15 oz) of chickpeas, drained and rinsed
- 4 cloves of garlic, thinly sliced
- 3 tablespoons of good-quality olive oil
- 1/2 teaspoon of red pepper flakes (adjust to your heat preference)
- Juice of 1 lemon (about 2 tablespoons)
- 1/2 teaspoon of fine sea salt
- 1/4 teaspoon of black pepper
- 30g (about 1/3 cup) of freshly grated Parmesan cheese, to serve
- Lemon wedges, for serving
Tools You’ll Need
- A large skillet or wide sauté pan (12 inches / 30 cm works best)
- A sharp chef’s knife
- A cutting board
- A colander (for draining chickpeas)
- A box grater or microplane (for the Parmesan)
- Tongs or a wooden spoon
- A citrus juicer or just your hands
Pro Tips
These are the things I wish someone had told me the first time I cooked Swiss chard.
- Don’t throw away the stems. Swiss chard stems are completely edible and delicious. Just add them to the pan 2 minutes before the leaves since they take slightly longer to soften. Color, texture, and zero waste.
- Dry your chard before it hits the pan. Wet leaves = steam, not sauté. Pat them dry after washing or spin them in a salad spinner. You want that nice pan-to-leaf contact.
- Toast the chickpeas a little. Let them sit in the hot oil for 2 full minutes before you stir them. They’ll develop a slightly crispy exterior that adds the best texture contrast against the soft chard.
- Garlic goes in on medium, not high. Burned garlic ruins the entire dish. You want it golden and fragrant, not brown and bitter. Low and slow on the garlic is always the move.
- Add lemon OFF the heat. Lemon juice loses its brightness when it cooks too long. Take the pan off, squeeze the lemon, toss everything together. You’ll taste the difference immediately.
How to Make Sautéed Swiss Chard with Chickpeas
Step 1: Prep the Chard
Wash your Swiss chard leaves thoroughly and pat them dry.
Separate the stems from the leaves by running your knife along each side of the stem. Chop the stems into 1-inch pieces. Stack the leaves and roughly chop or tear them into large, rustic pieces. Set aside separately.
Step 2: Drain and Dry the Chickpeas
Open your can of chickpeas, drain them in a colander, and rinse under cold water.
Spread them out on a paper towel and pat dry. The drier they are, the crispier they’ll get in the pan.
Step 3: Toast the Chickpeas
Heat 3 tablespoons of olive oil in your large skillet over medium-high heat.
Add the chickpeas in a single layer. Let them sit undisturbed for 2 minutes. Then give them a shake or stir. You’re looking for a light golden crust on the outside. Season with a pinch of salt and pepper, then push them to the side of the pan.
Step 4: Cook the Garlic and Chard Stems
Reduce heat to medium. Add the sliced garlic and chard stems to the pan.
Cook for 2 to 3 minutes, stirring occasionally, until the garlic is golden and fragrant and the stems have softened slightly. Watch the garlic — the moment it turns golden, move to the next step.
Step 5: Add the Chard Leaves
Add the chopped chard leaves to the pan in batches if needed. They’ll look like a mountain, but they cook down fast — we’re talking 2 to 3 minutes.
Toss everything together with tongs. Add the red pepper flakes. Season with remaining salt and pepper. Cook until the leaves are fully wilted but still have a little color and body to them.
Step 6: Finish and Serve
Remove the pan from heat. Squeeze the lemon juice over everything and toss.
Taste it. Adjust salt if needed. Transfer to a serving dish, top with a generous handful of freshly grated Parmesan, and add lemon wedges on the side.
Serve immediately.
Substitutions and Variations
This recipe is very forgiving. Here’s how to make it work for you:
| Ingredient | Swap It For |
|---|---|
| Swiss chard | Kale, spinach, or beet greens |
| Chickpeas | White beans, lentils, or cannellini beans |
| Parmesan | Pecorino Romano, nutritional yeast (vegan), or omit |
| Olive oil | Avocado oil or butter |
| Red pepper flakes | Smoked paprika or a pinch of cayenne |
| Lemon juice | White wine vinegar or a splash of dry white wine |
Want to make it a full meal? Serve over creamy polenta, toss it with pasta, or pile it on toasted sourdough with a soft-poached egg on top.
Going vegan? Swap the Parmesan for nutritional yeast or a cashew-based Parmesan. Everything else is already plant-based.
Need more protein? Add crumbled Italian sausage or rotisserie chicken in Step 3 alongside the chickpeas.
Make-Ahead Tips
A few things you can prep in advance:
- Wash and chop the chard up to 2 days ahead. Store in a zip-lock bag with a paper towel inside to absorb moisture.
- Drain and dry the chickpeas the night before. Spread them on a tray and let them air-dry in the fridge uncovered for extra crispiness.
- Slice the garlic a few hours ahead and store it in a small bowl covered with olive oil. You can use that oil directly in the pan.
Nutritional Information (Per Serving, Approx.)
Based on 4 servings including Parmesan
| Nutrient | Amount |
|---|---|
| Calories | ~280 kcal |
| Protein | 10g |
| Carbohydrates | 22g |
| Dietary Fiber | 7g |
| Fat | 16g (mostly unsaturated) |
| Iron | ~25% of daily recommended intake |
| Vitamin K | Over 300% of daily recommended intake |
| Vitamin A | ~50% of daily recommended intake |
One thing worth knowing: Swiss chard is one of the most nutrient-dense vegetables you can eat. A single cup of cooked chard delivers more Vitamin K than most people get in an entire week. It’s also a solid source of magnesium, potassium, and antioxidants.
Meal Pairing Suggestions
Not sure what to serve this with? Here are some combinations that work really well:
- Roasted chicken thighs + this chard = a complete, easy weeknight dinner
- Grilled salmon with the lemony chard on the side is a genuinely good pairing
- Soft polenta underneath the chard and chickpeas turns it into proper comfort food
- Crusty sourdough to mop up the garlicky oil at the bottom of the pan (don’t waste that)
- Poached or fried eggs on top for a high-protein brunch situation
Leftovers and Storage
This dish keeps surprisingly well.
- Refrigerator: Store in an airtight container for up to 3 days. The chard softens more as it sits, but the flavor actually deepens overnight.
- Reheating: Warm in a skillet over medium heat with a tiny splash of water or olive oil. Microwave works too, but the skillet keeps the texture better.
- Freezing: Not recommended. Leafy greens lose all their texture once frozen and thawed.
A cold, leftover version of this also works really well stirred into scrambled eggs or used as a pizza topping the next day. Just saying.
FAQ
Can I use rainbow chard instead of regular Swiss chard?
Yes, completely interchangeable. Rainbow chard has the same flavor — the different colored stems are just aesthetic. Use whichever you can find.
My Swiss chard tastes slightly bitter. What went wrong?
Nothing went wrong. Swiss chard does have a mild, earthy bitterness that’s completely normal. The lemon juice and salt balance it out. If you’re very sensitive to bitterness, blanch the chard in salted boiling water for 60 seconds before adding it to the pan.
Can I use dried chickpeas instead of canned?
You can. Cook them from scratch until tender (about 1 to 1.5 hours after an overnight soak), then use them in the same way. The texture is better, honestly, but canned is perfectly fine for a weeknight.
Is Swiss chard the same as silverbeet?
In many countries, yes — silverbeet and Swiss chard are the same vegetable, just different names. Use them identically.
How do I know when the chard is done?
The leaves should be wilted, slightly darkened, and tender but not mushy. If they still look bright green and stiff, give them another minute. If they’re falling apart and olive-drab in color, they’ve gone a little too long.
Can I make this without the Parmesan?
Absolutely. It’s great without it. A squeeze of extra lemon and a drizzle of good olive oil at the end will do the same job of adding richness.
Wrapping Up
If this recipe taught me anything, it’s that the vegetables you’ve been ignoring at the grocery store are usually the ones worth trying.
Swiss chard is fast, forgiving, and genuinely delicious when you cook it right. This dish takes 20 minutes, uses one pan, and delivers flavors that feel way more put-together than the effort it actually took.
Give it a go this week. And when you do, drop a comment below — tell me how it turned out, what you swapped, what you served it with. I read every single one and honestly love hearing how you made it your own.